Create a contact on Hubspot when a user registers on your Website (via Zappier)
- Skill required
- Basic Internet Proficiency
Manually exporting user data from your DjaoApp app to HubSpot can be a cumbersome process. The good news is, you can automate this task using Zapier, a tool that connects different apps to create automated workflows, also known as "Zaps."
In this tutorial, we'll guide you through the process of setting up a Zap to automatically export new registered users from DjaoApp to HubSpot.
Pre-requisites
- A DjaoApp Website
- A HubSpot account
- A Zapier account (If you don't have one, you can sign up for free at Zapier)
Step 1: Create a New Zap
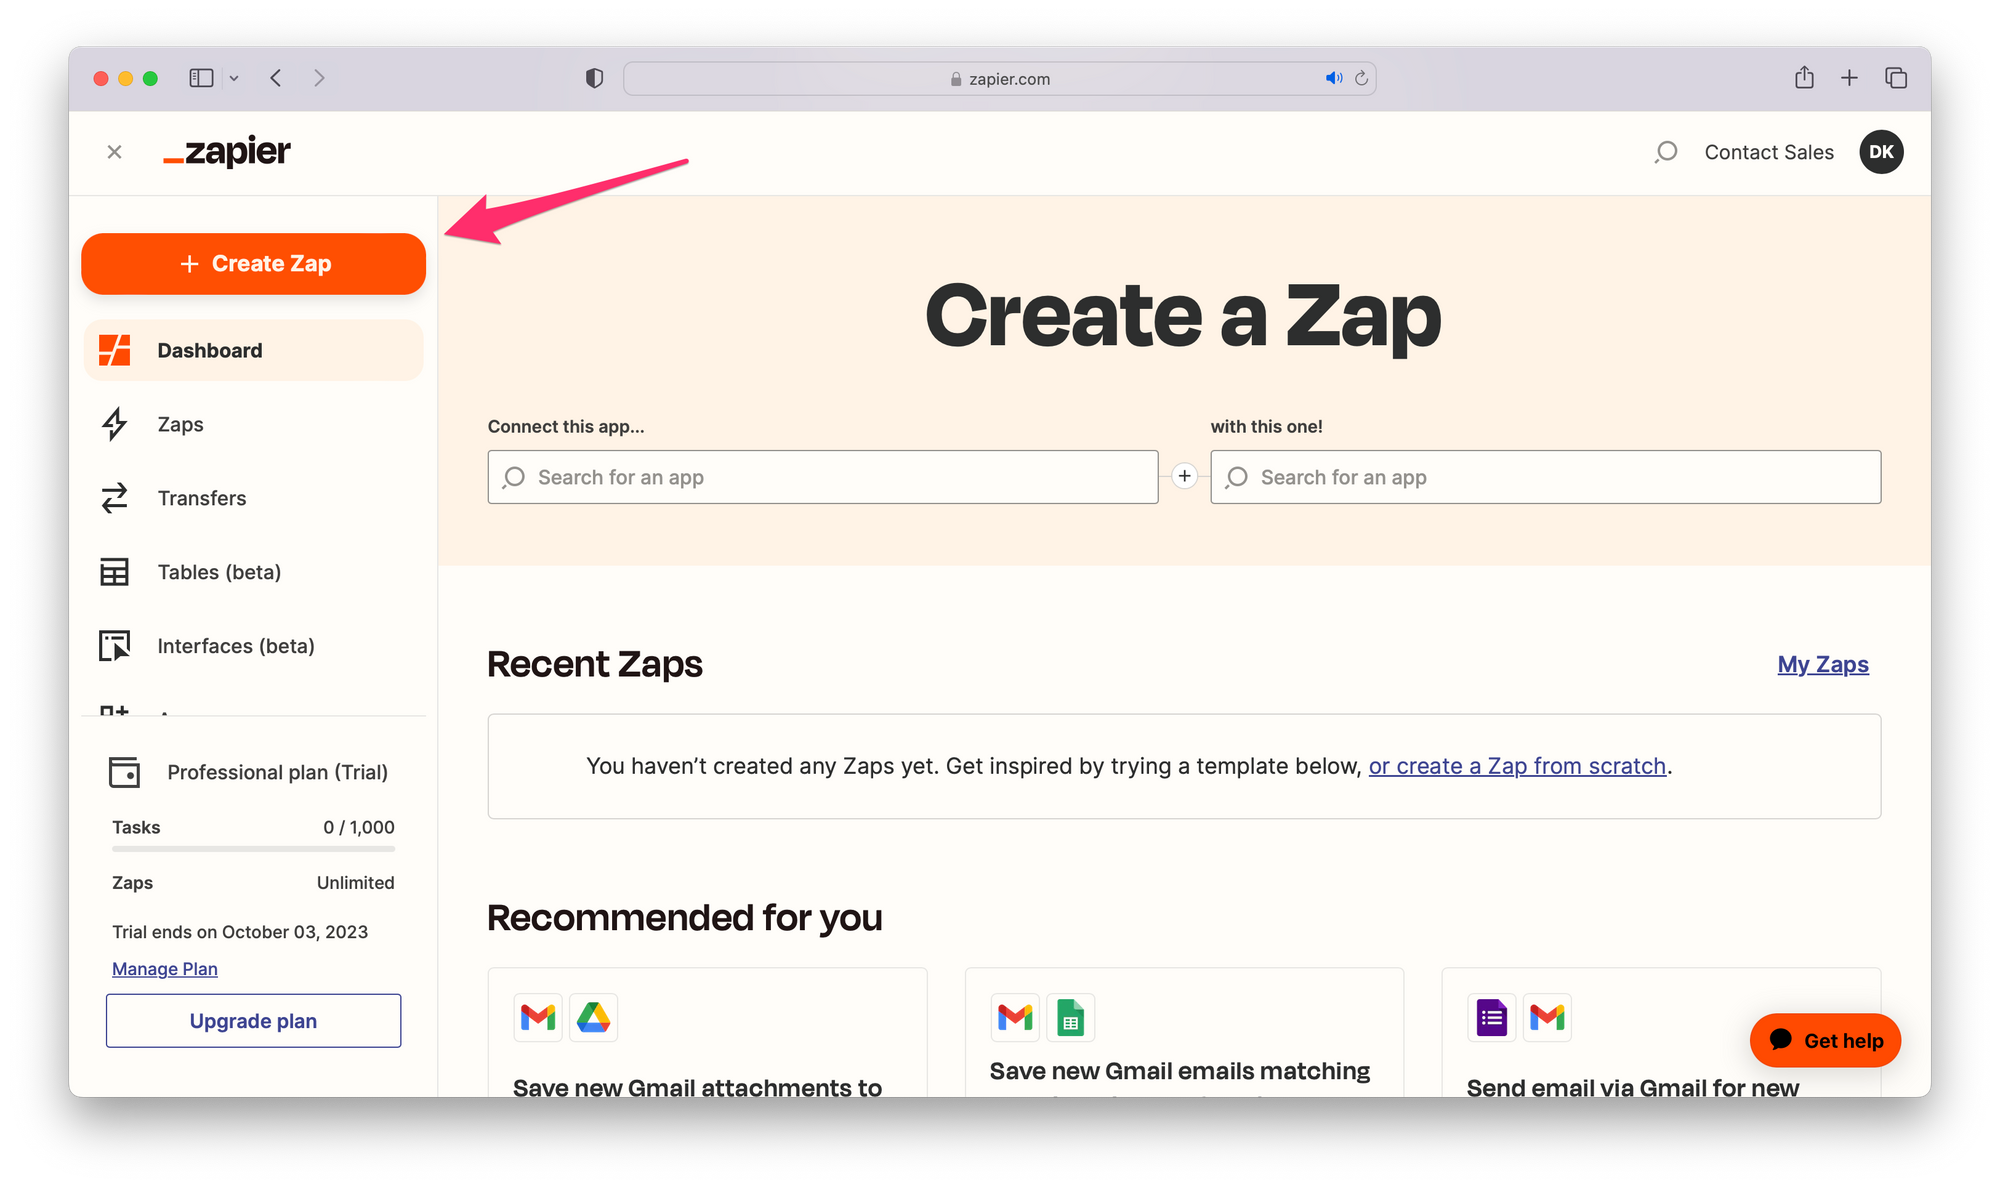
After logging in to your Zapier account, click on "Create Zap" in the upper left corner of your dashboard.
Step 2: Set Up Webhooks Trigger Event
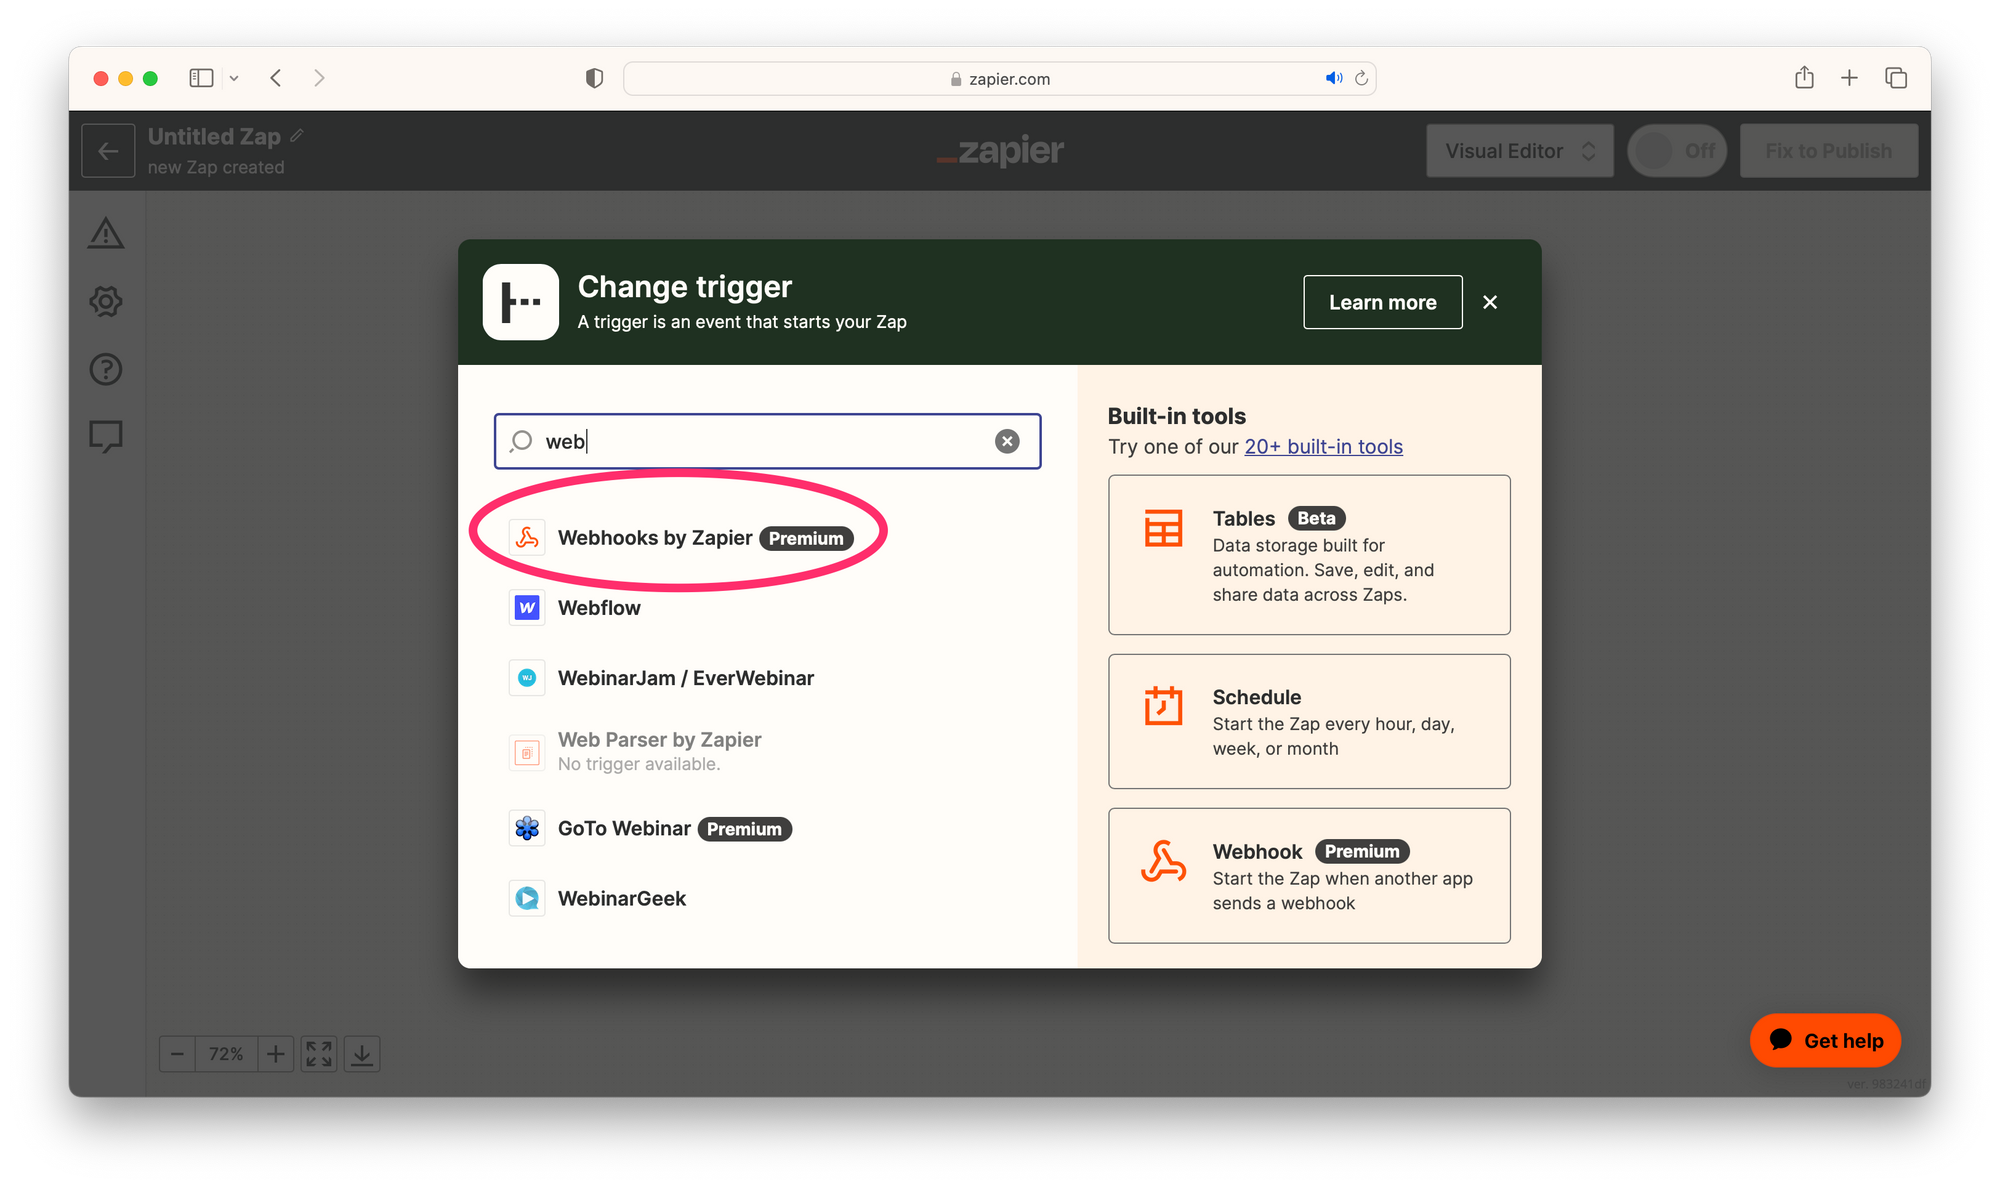
While DjaoApp is not natively supported as a trigger app in Zapier, you can use Webhooks by Zapier to create this integration easily.
- In the "Choose a Trigger App" search box, type "Webhooks by Zapier".
- Select it from the dropdown list
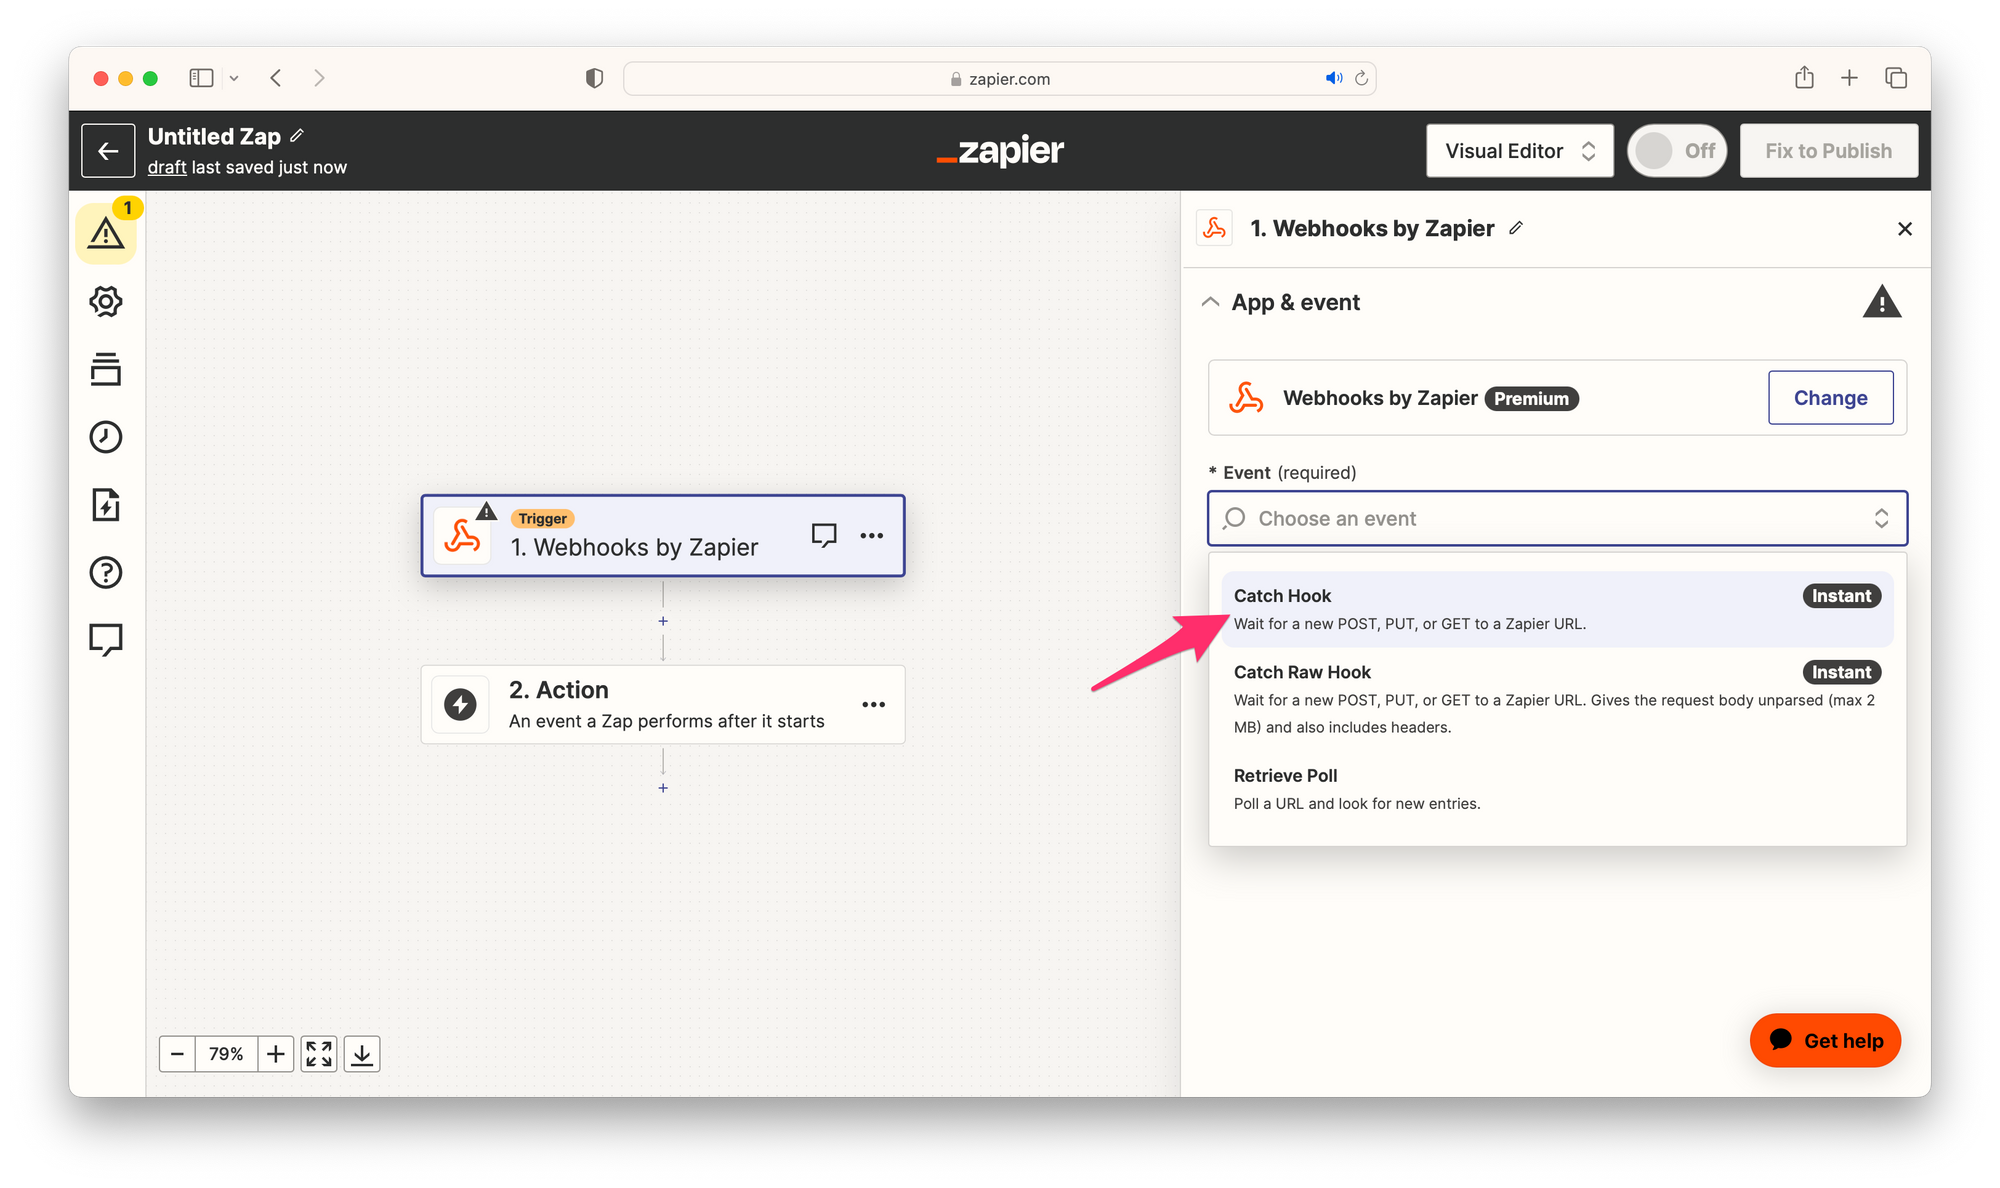
3. For the trigger event, choose "Catch Hook".
4. Click "Continue" and then select a “Test” toggle.
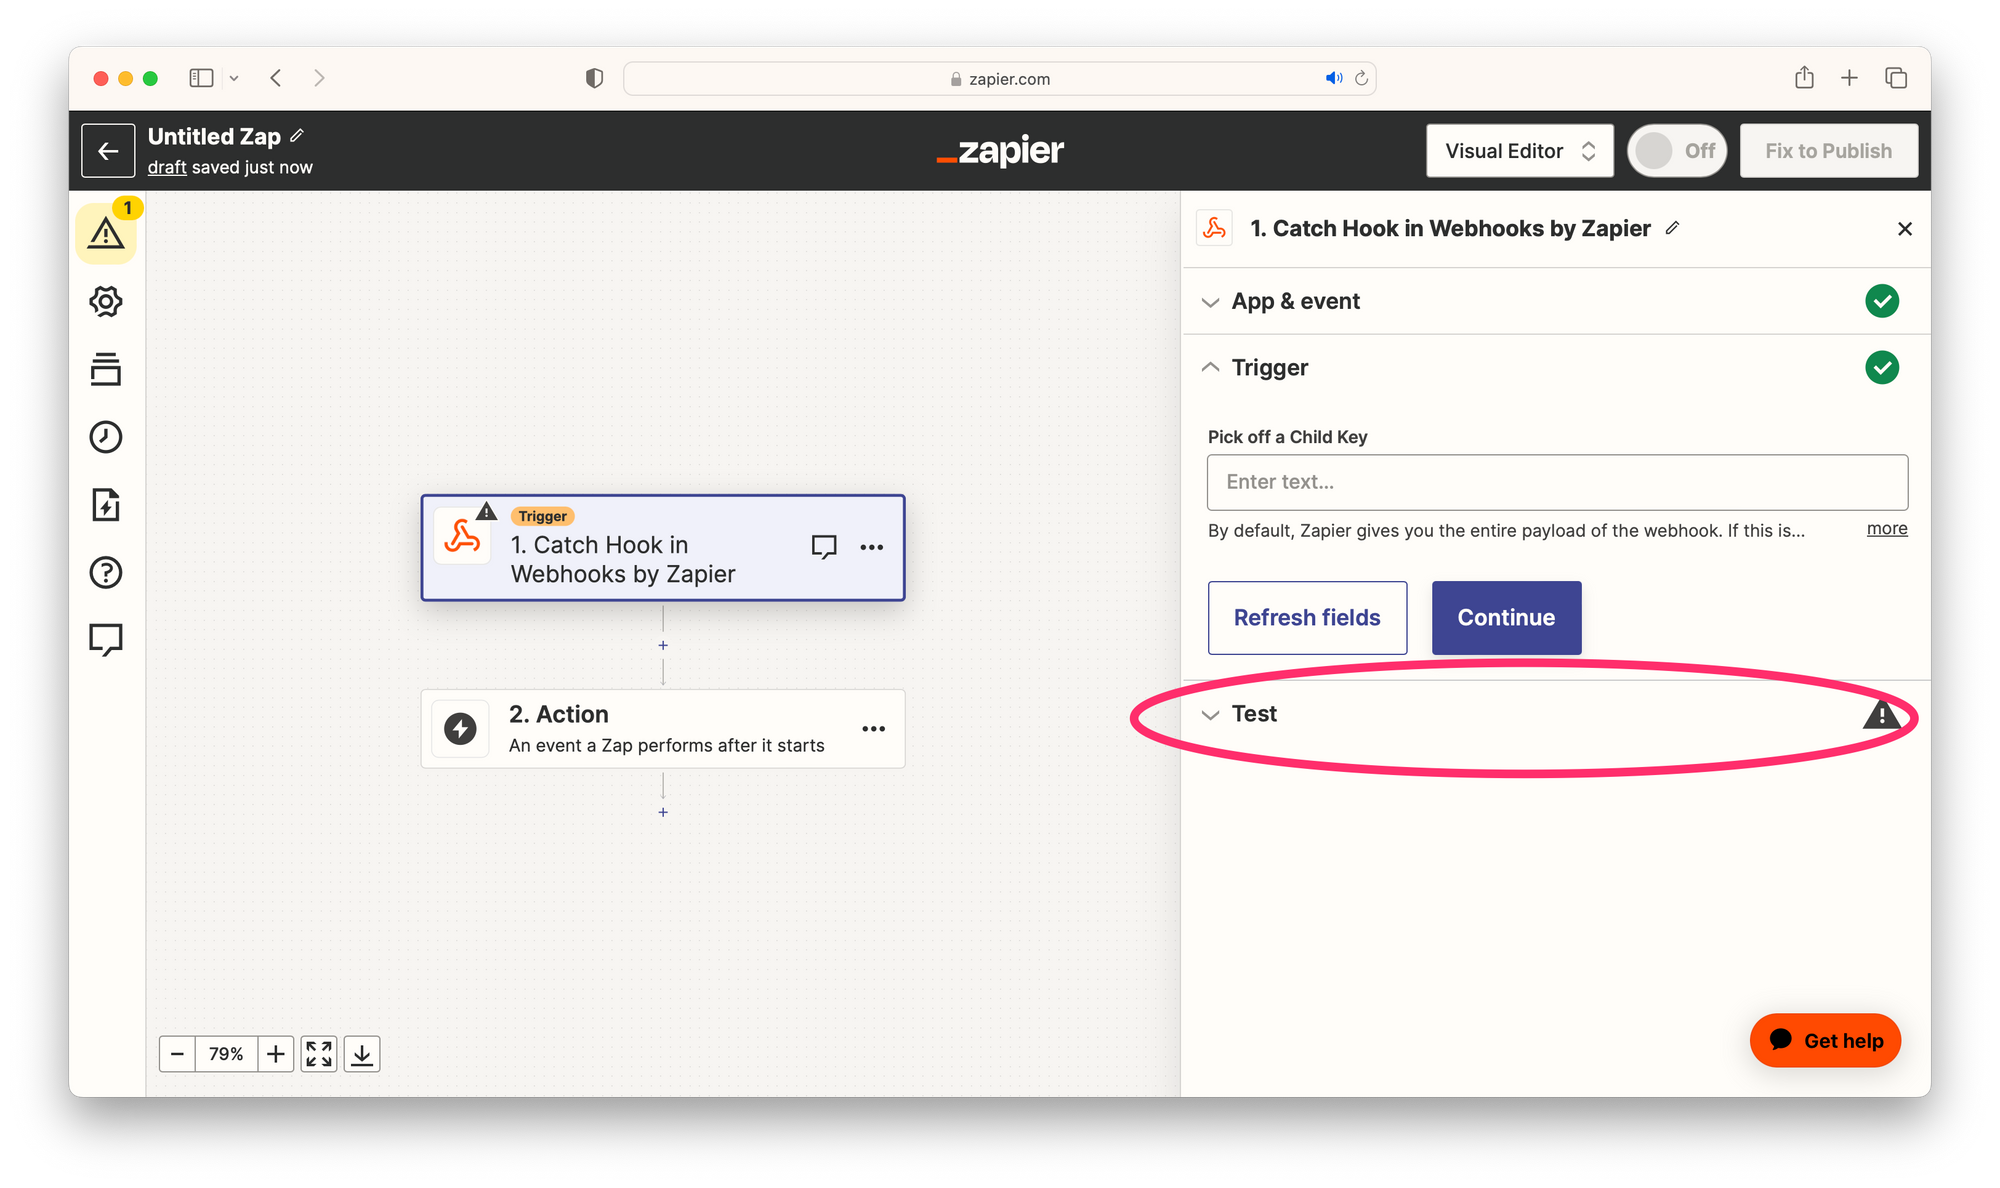
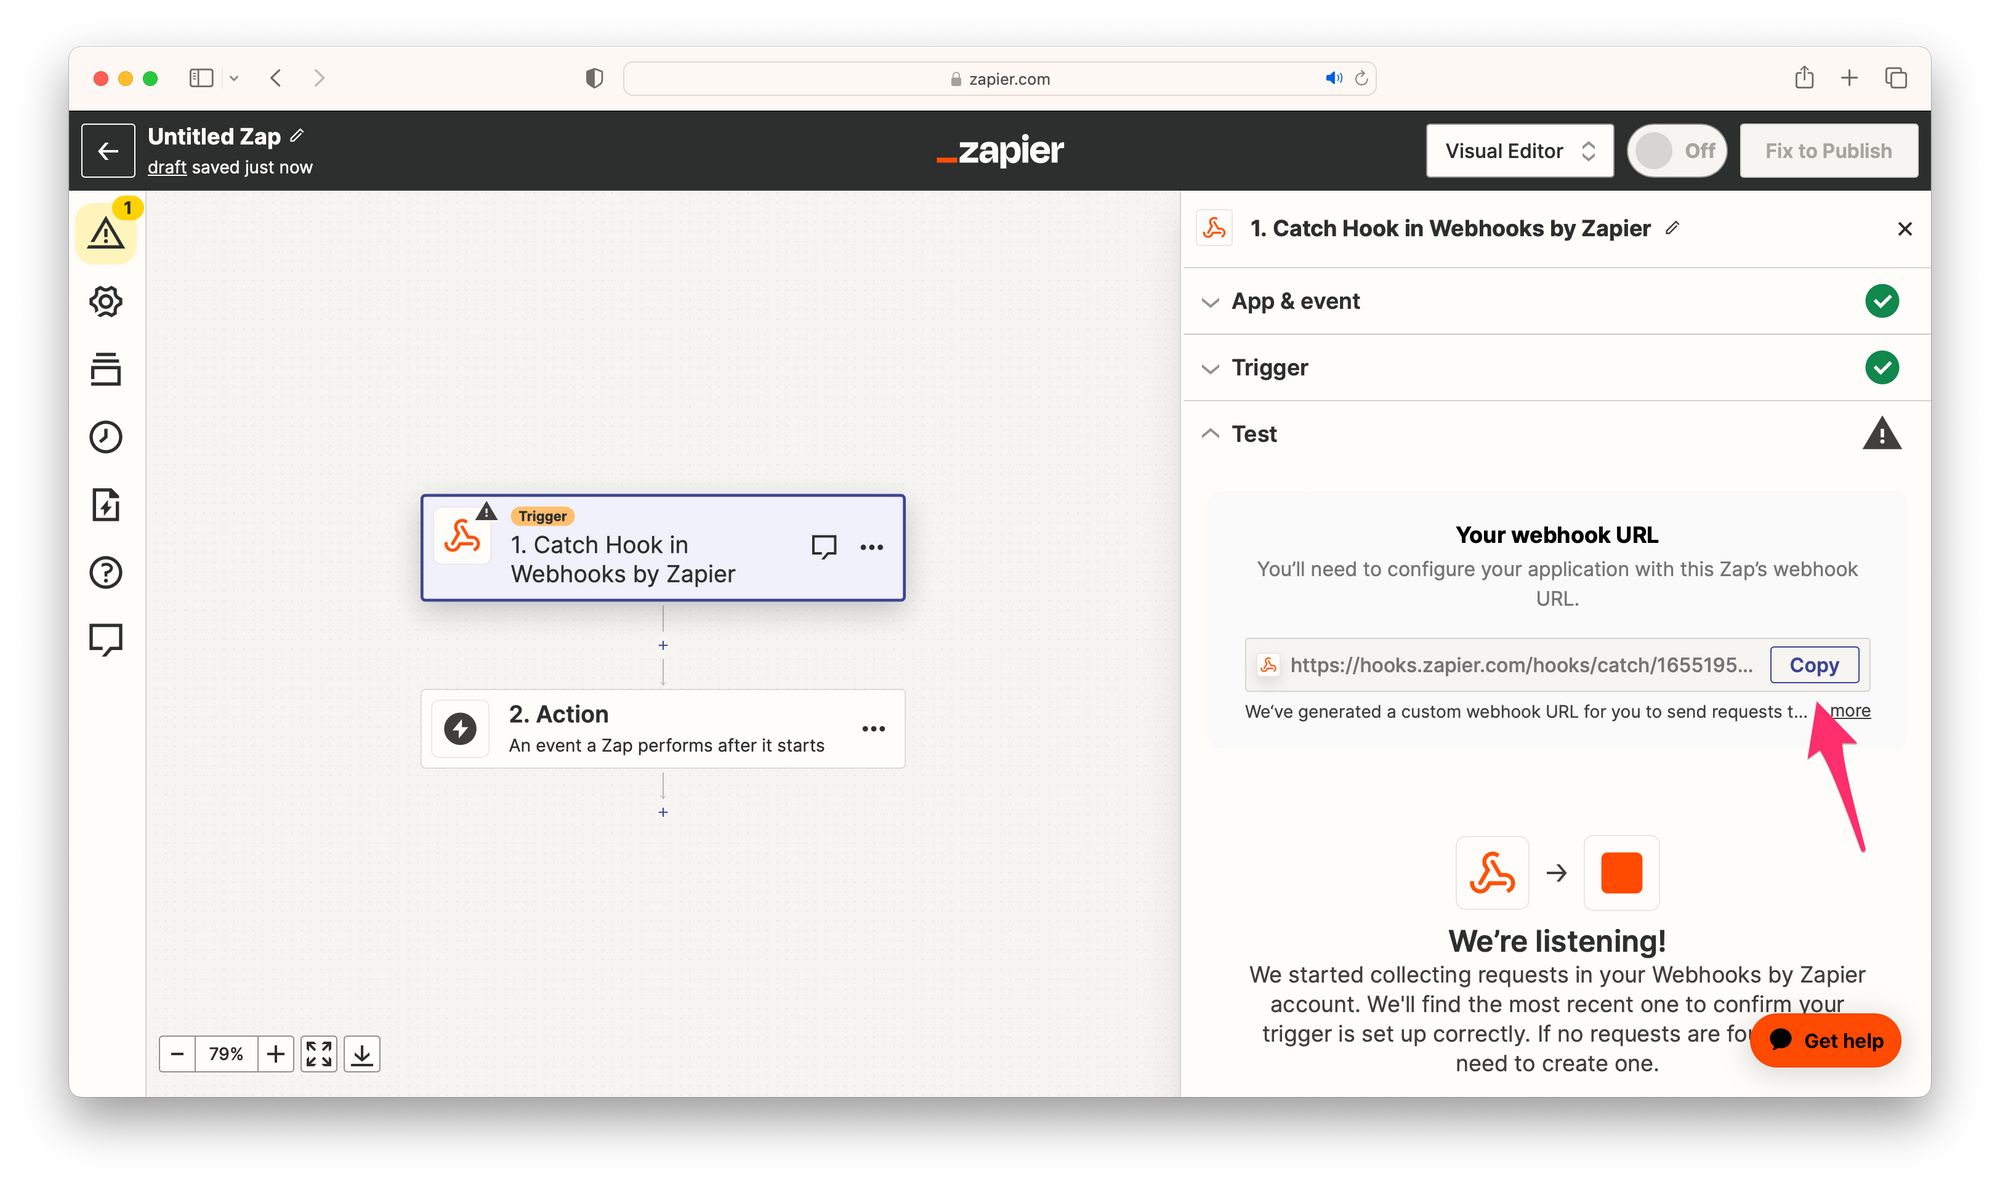
5. Zapier will now generate a custom Webhook URL for you, click the “Copy” button to copy the Webhook URL.
Step 3: Set the Webhook URL in DjaoDjin's Control Panel
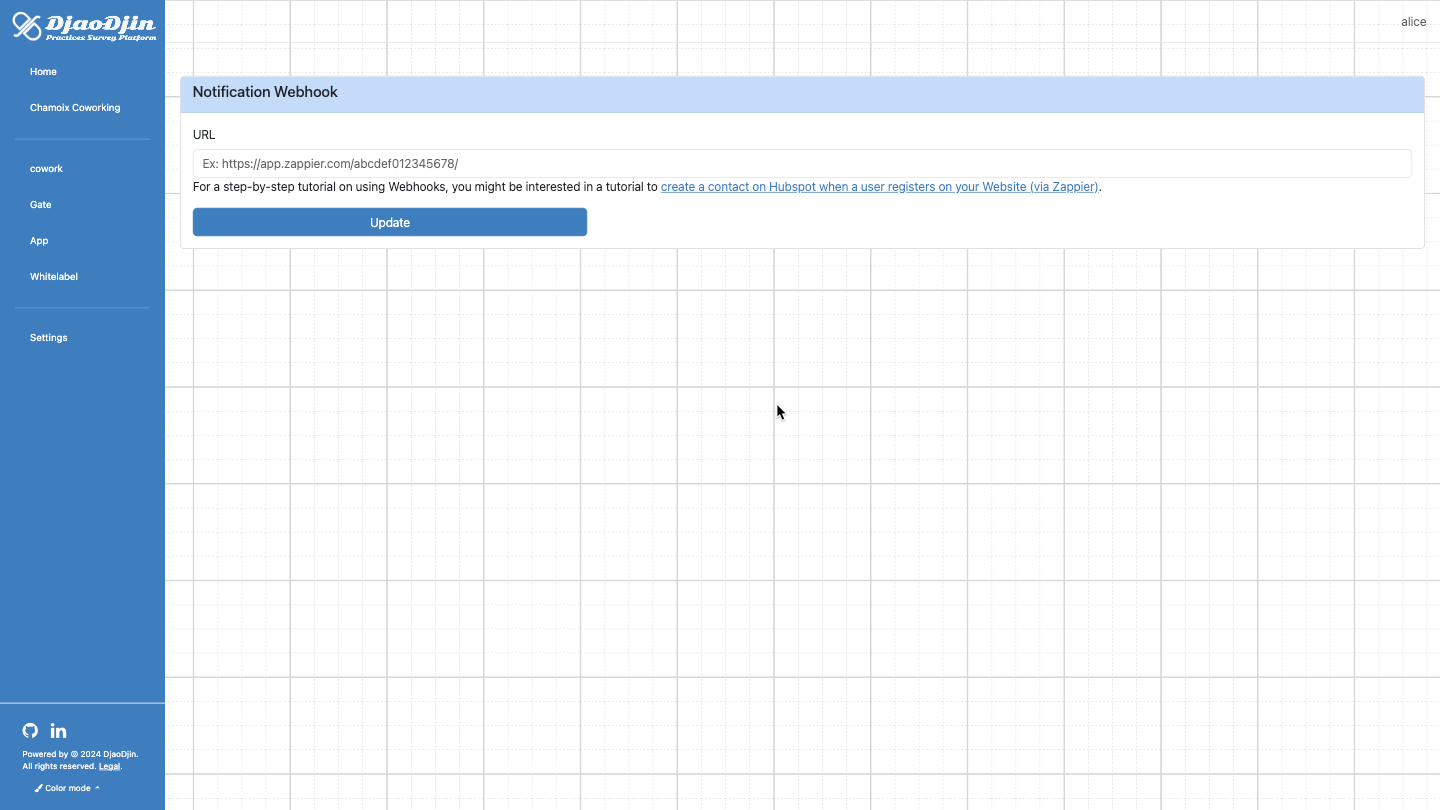
After you login to djaodjin.com, click Control Panel for your site, then Gate in the left side bar, then the Update link under the Webhooks section.
In the URL input field, enter the custom Webhook URL Zappier generated earlier, then click the Update button.
Step 4: Test Webhooks Trigger
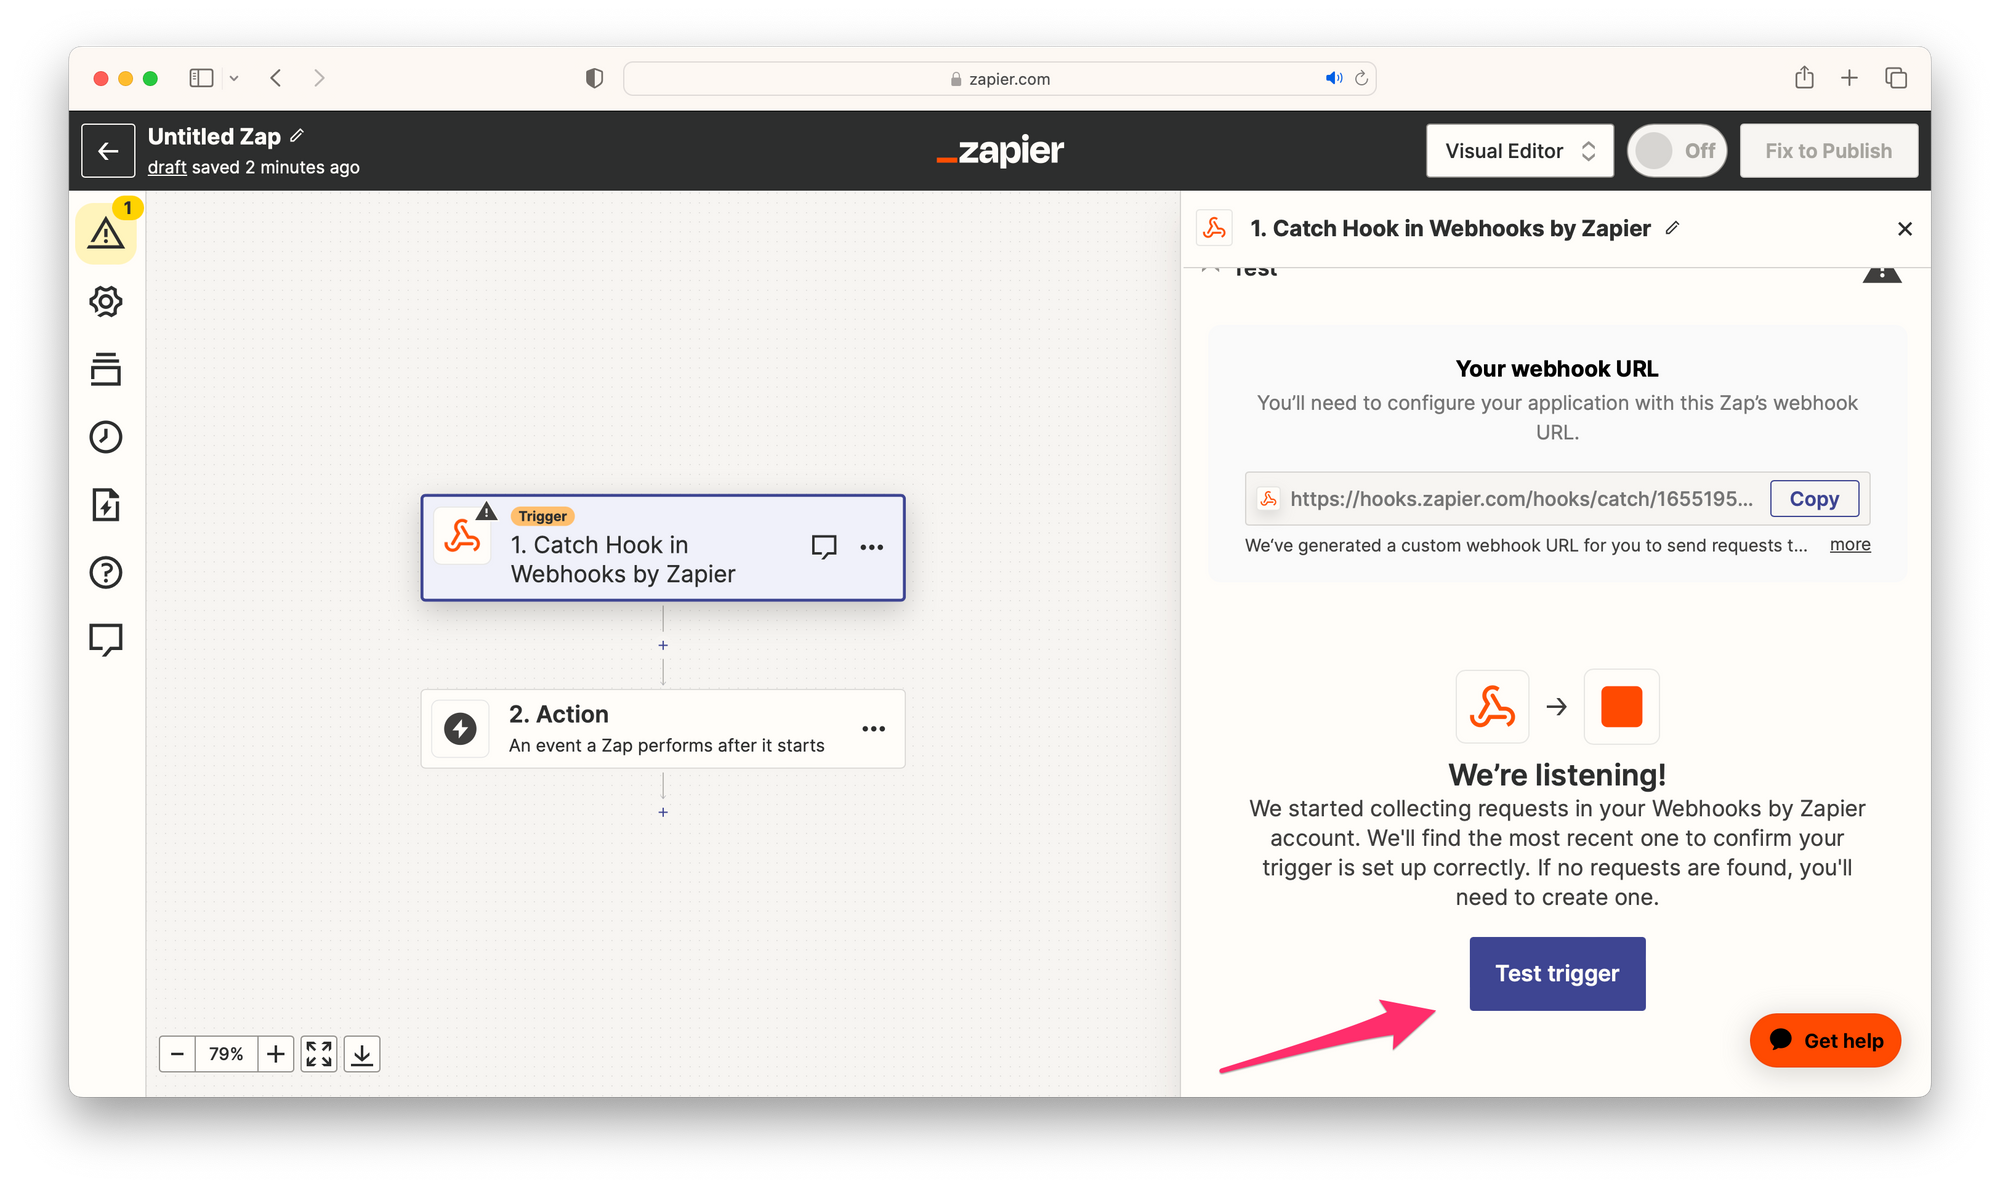
1. Return to your Zapier tab and click "Test trigger".
- 2. Create a new user registration in DjaoApp to trigger the Webhook.
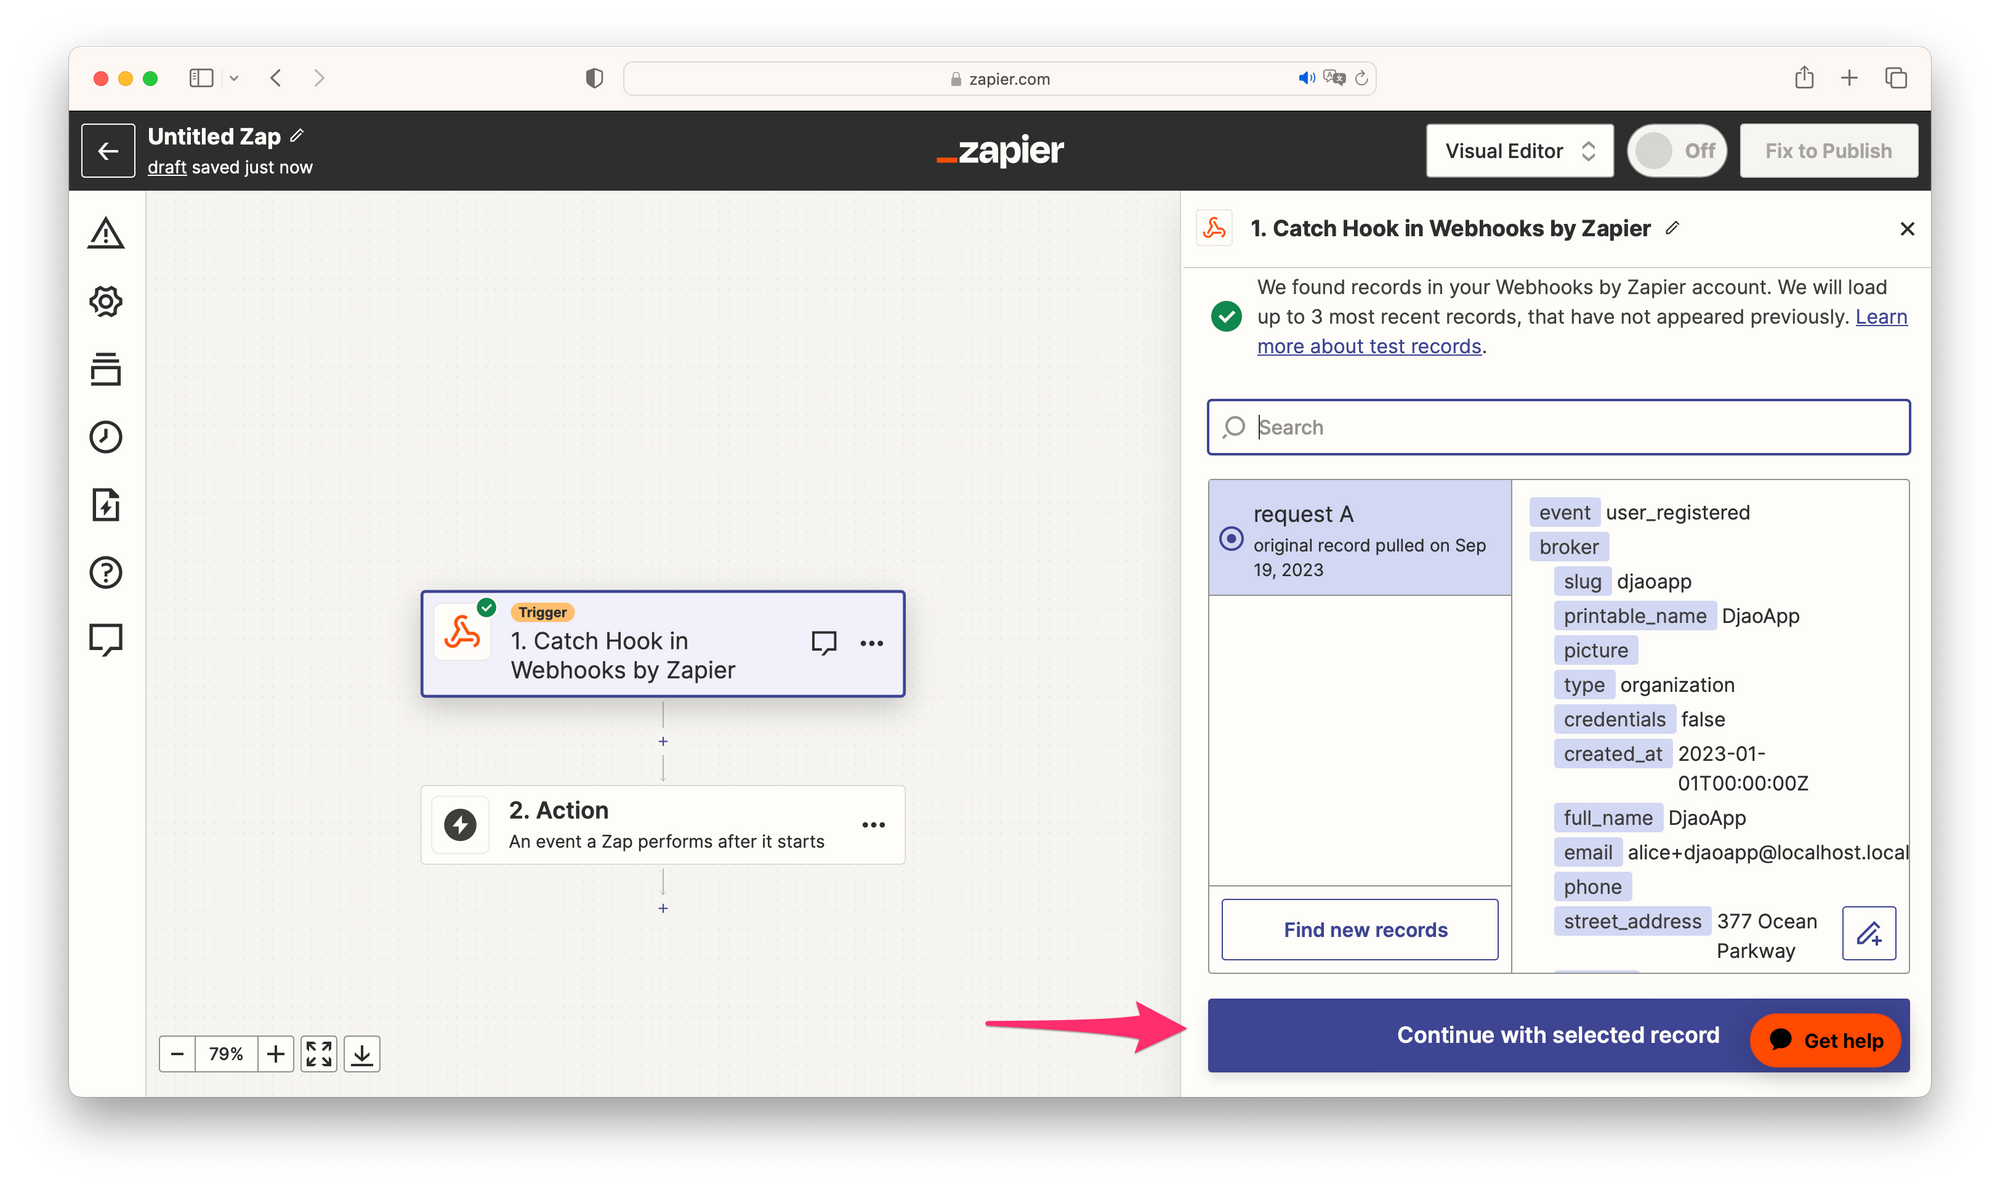
- 3. Once the test is successful, Zapier will show the sample data. Click "Continue with selected record".
Step 5: Choose HubSpot as the Action App
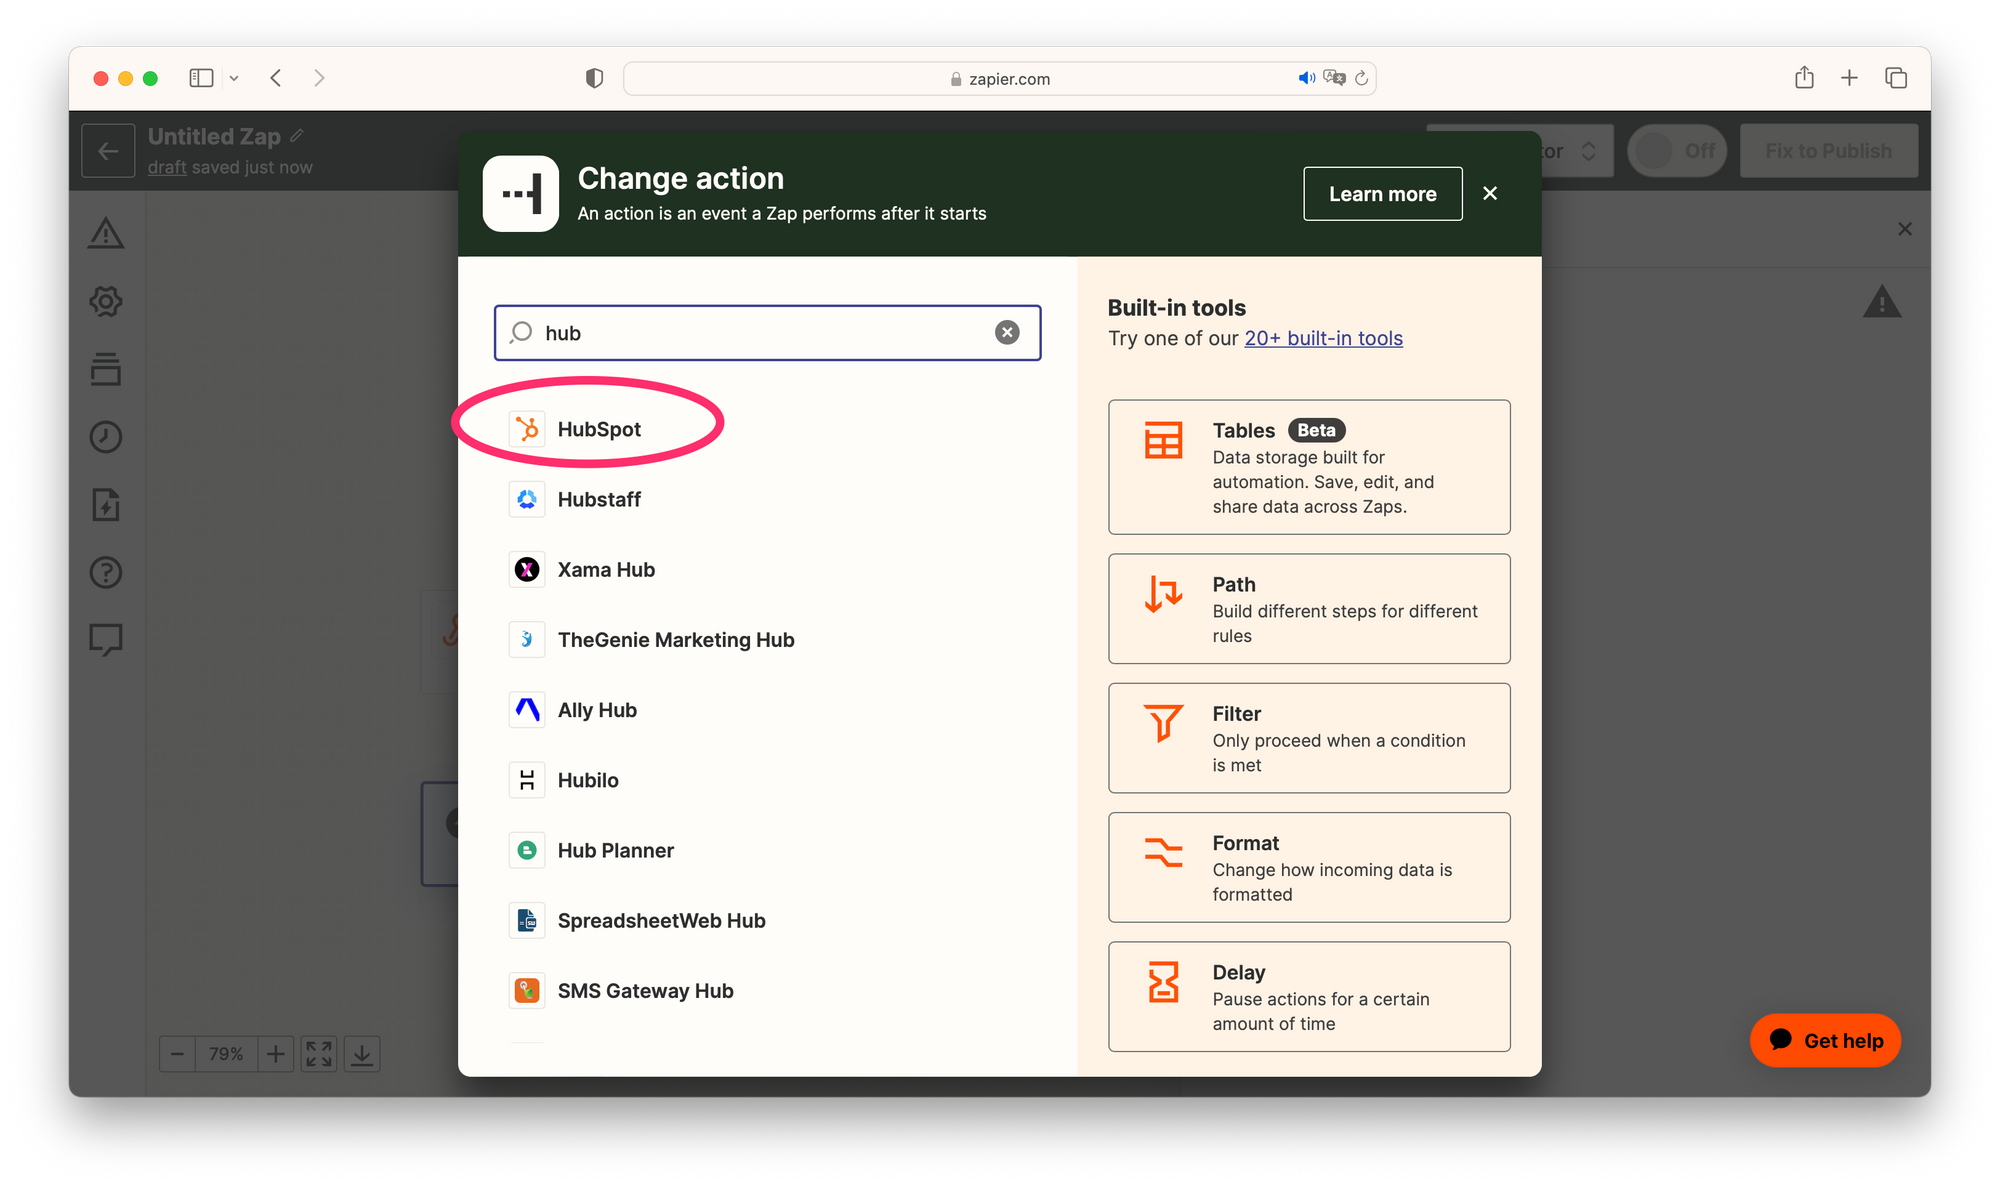
- 1. In the "Choose an Action App" search box, type "HubSpot".
- 2. Select HubSpot from the dropdown list.
- 3. Choose an action event, such as "Create or Update Contact".
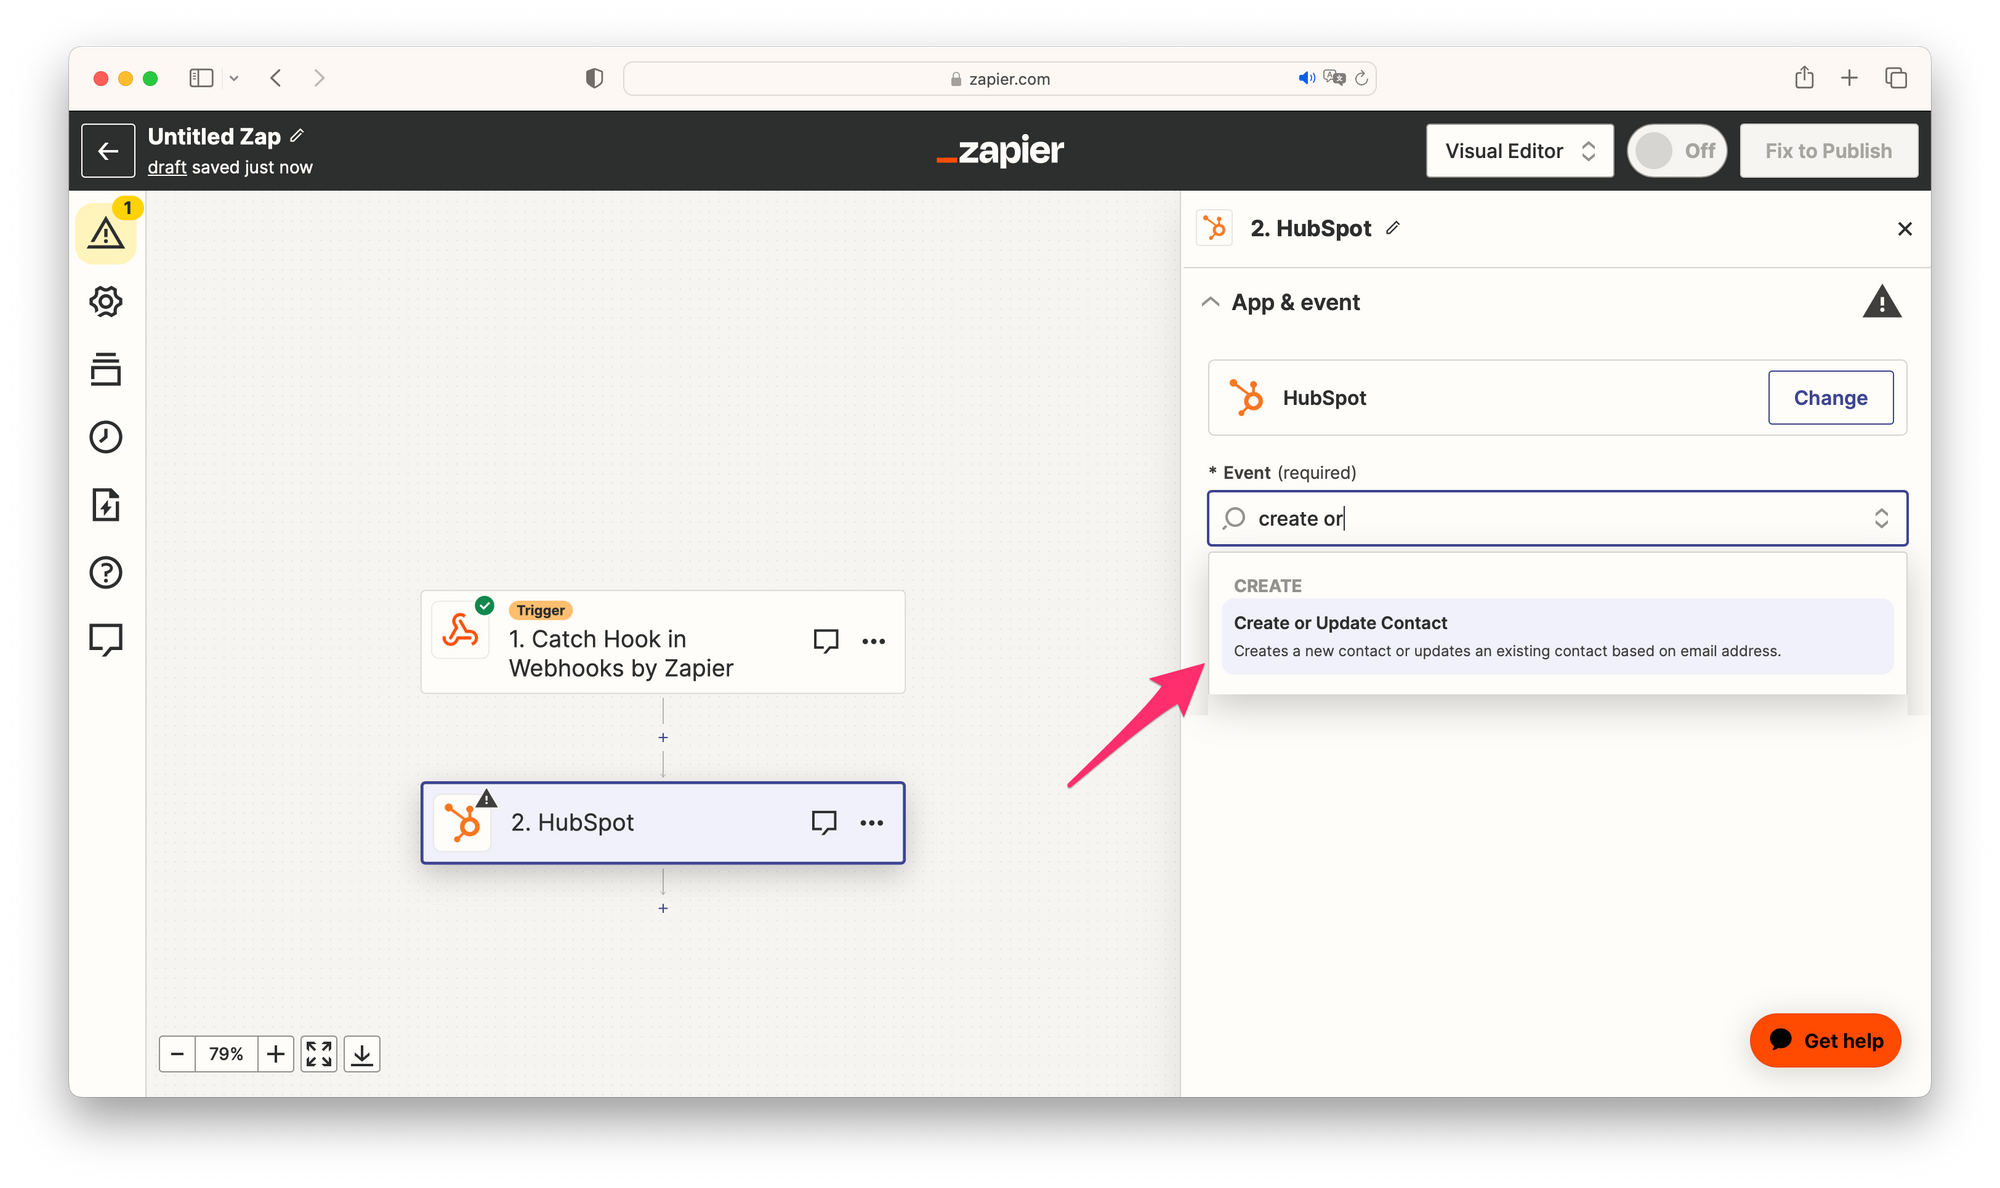
4. Click "Continue".
Step 6: Connect Your HubSpot Account to Zapier
- 1. Click "Sign in".
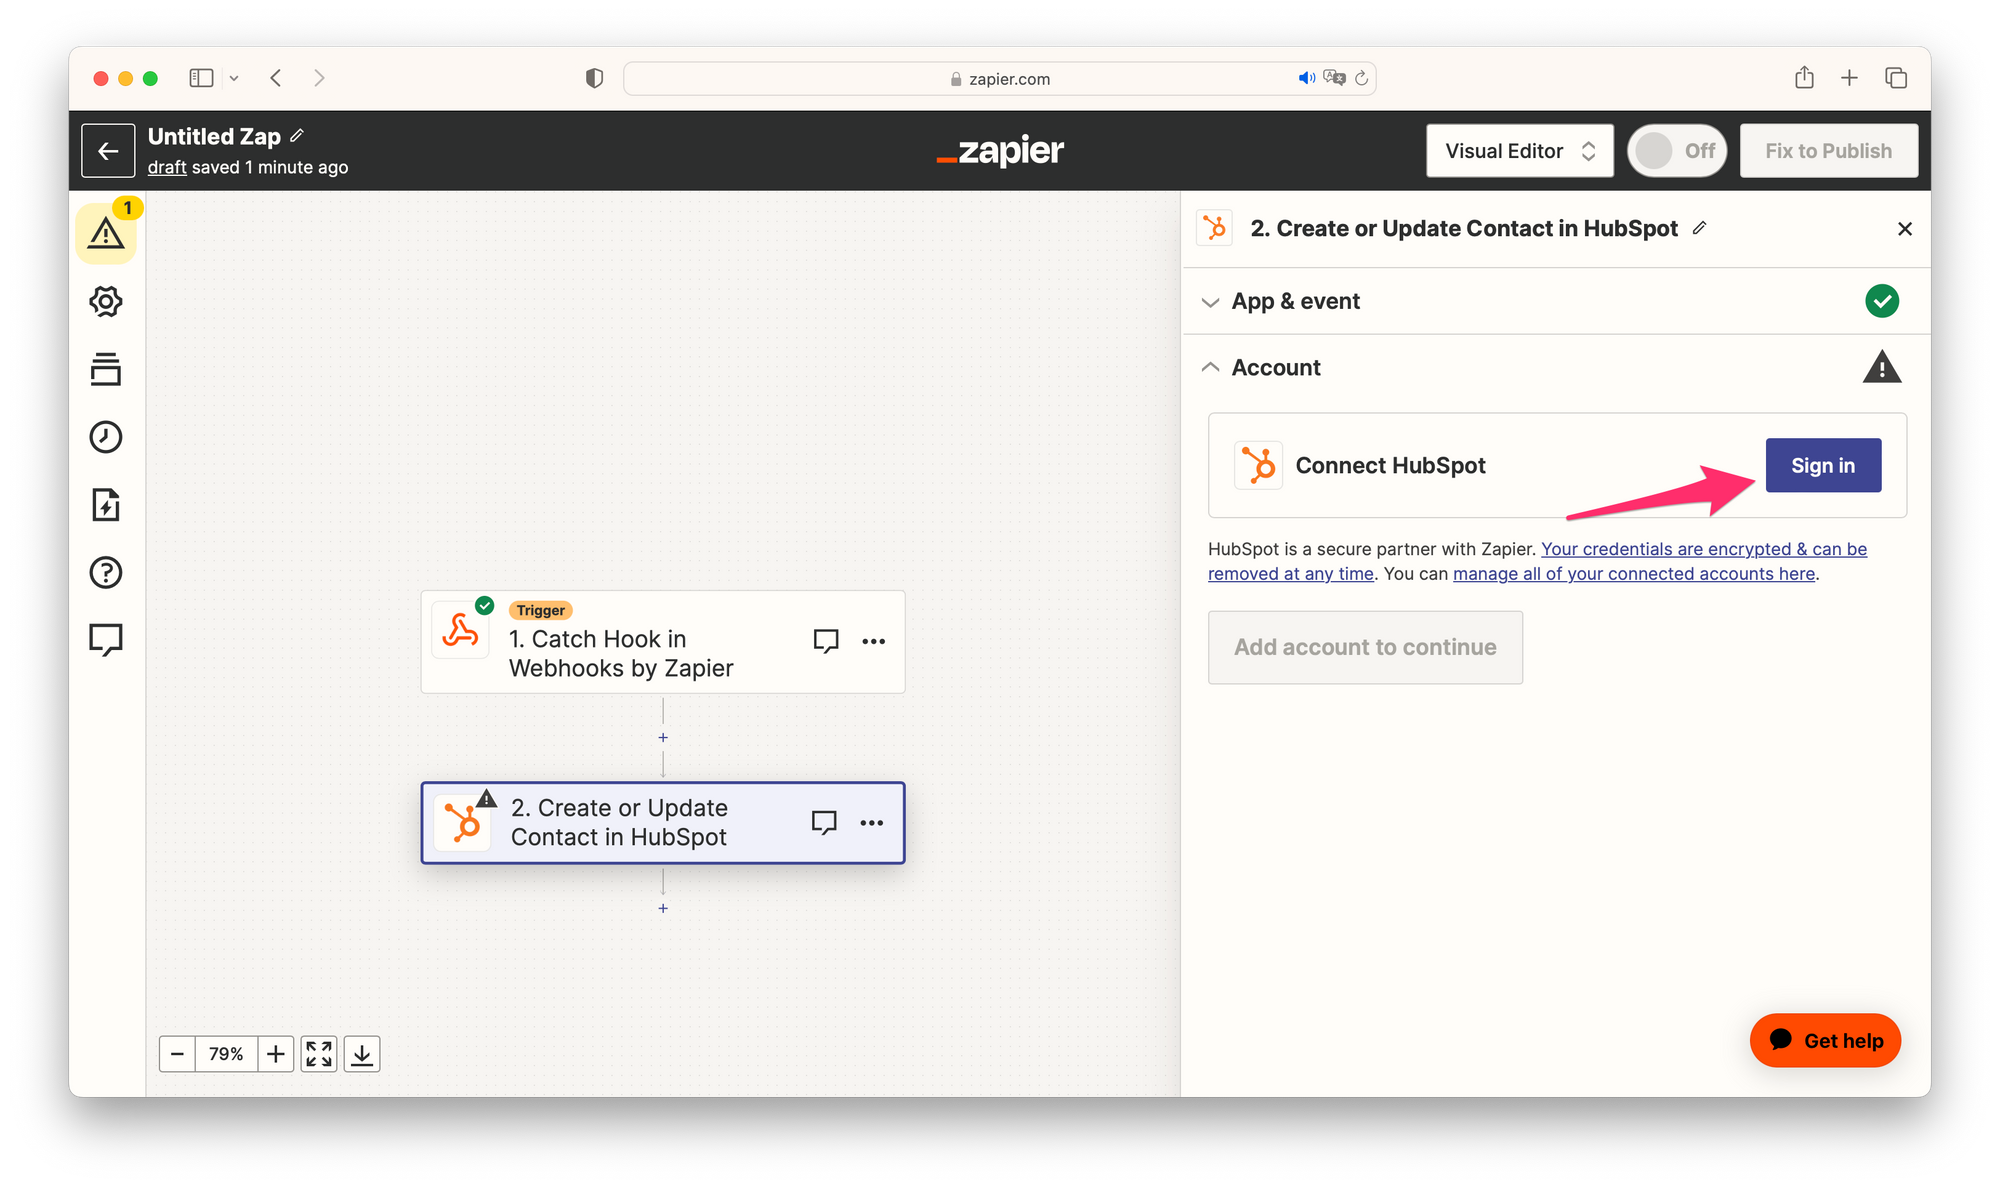
2. A new window will pop up asking for your HubSpot credentials. Authorize Zapier to access your HubSpot account.
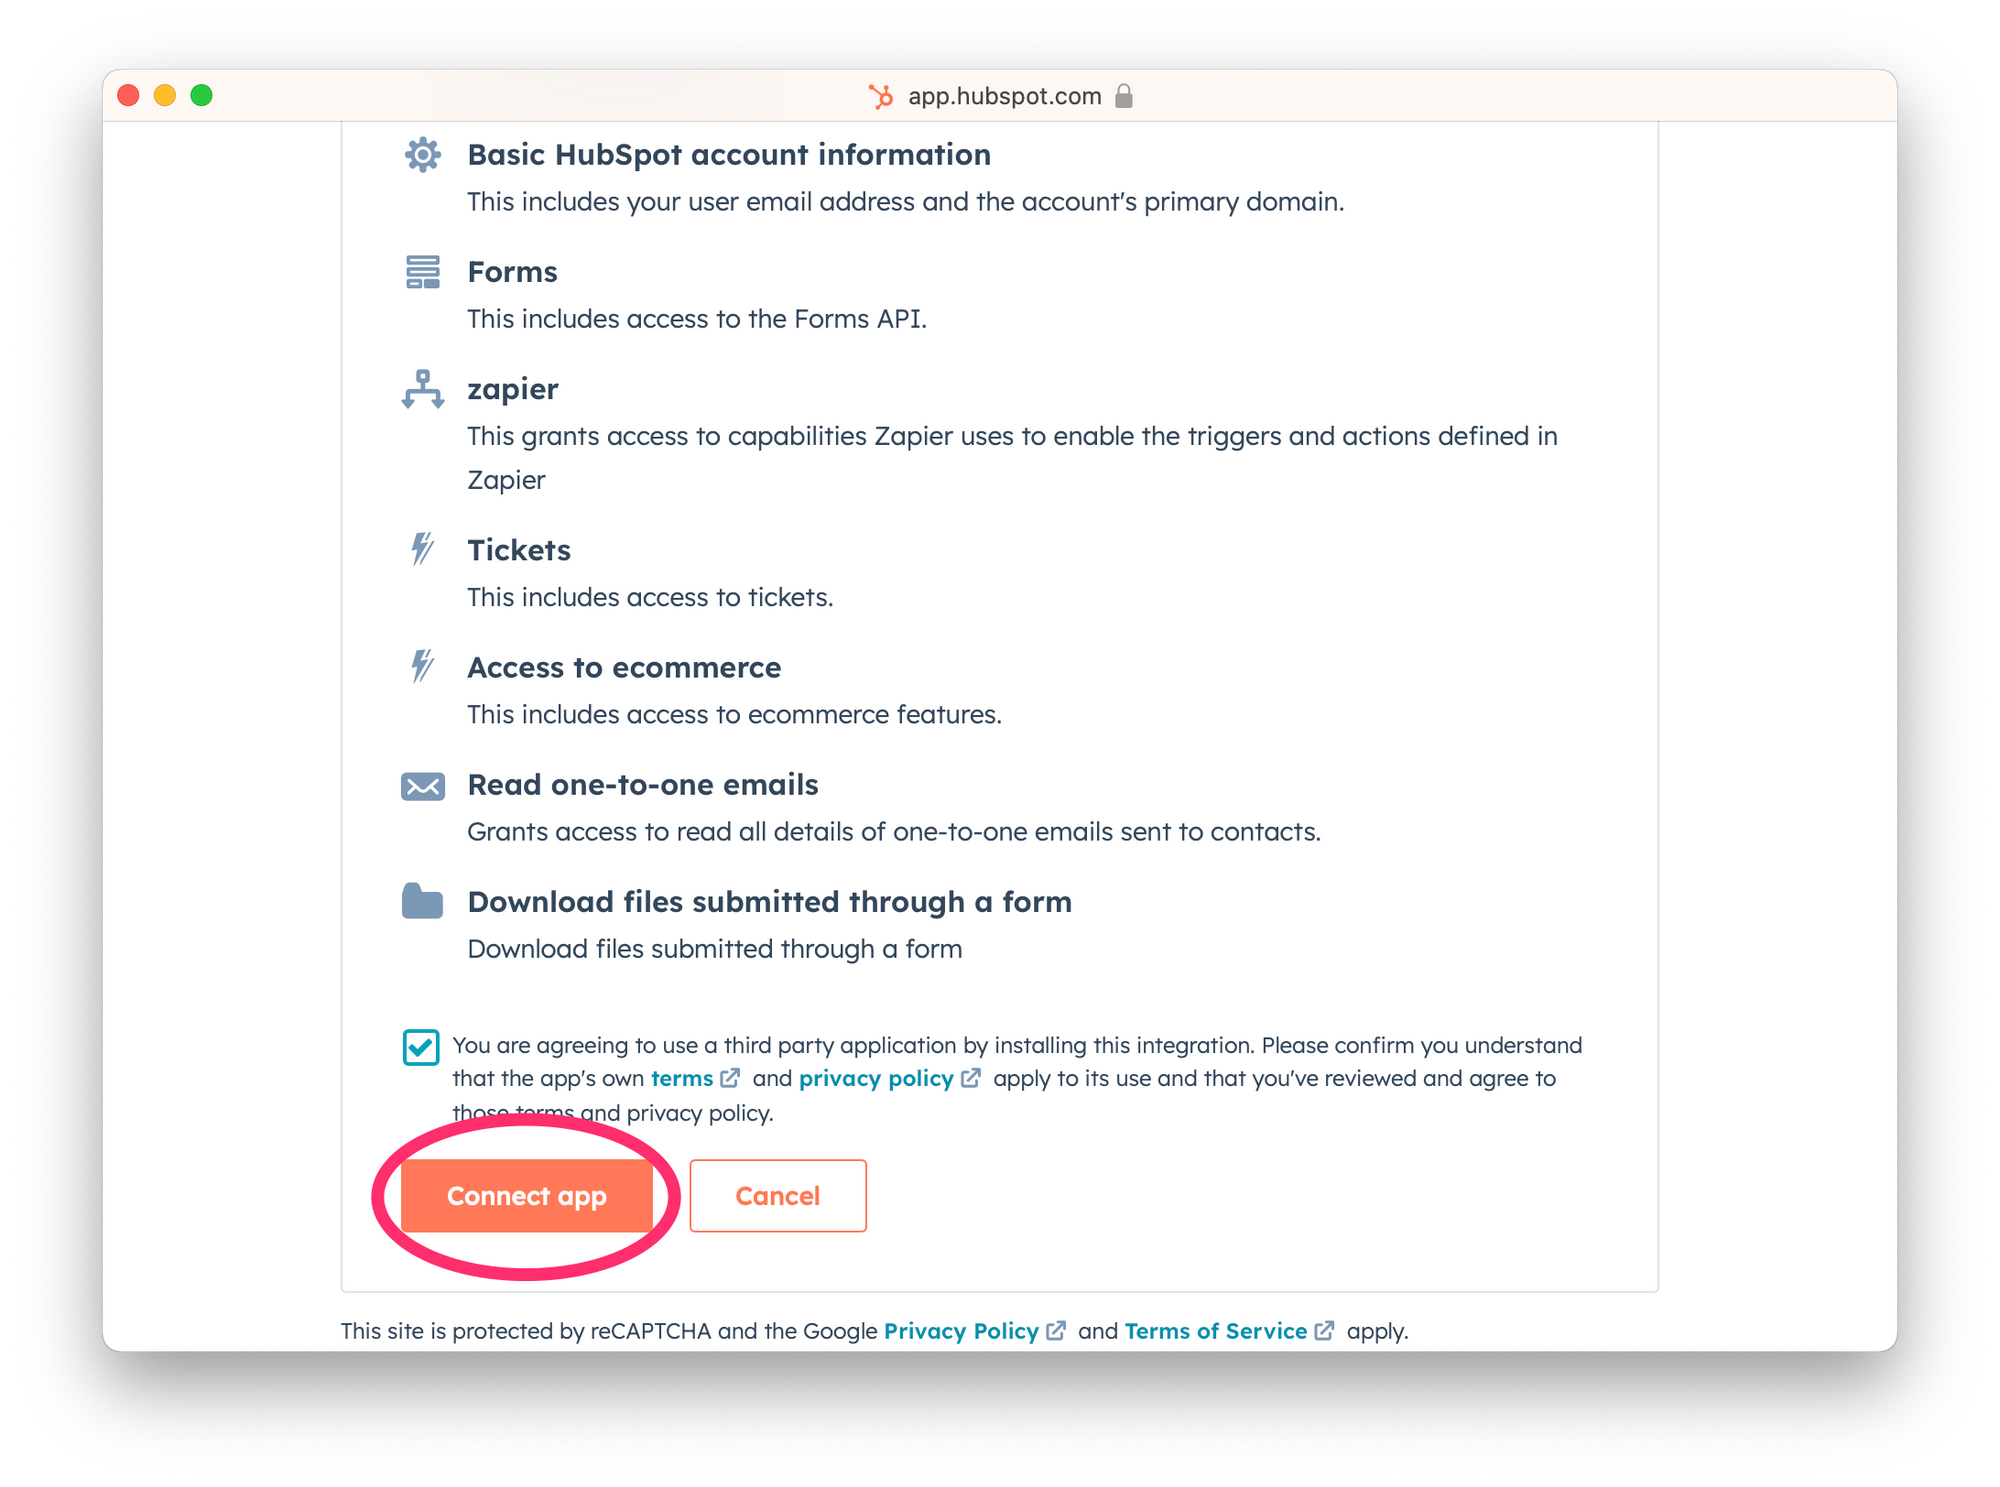
3. After connecting the app, click “Continue” to proceed to the “Action” step.
Step 7: Configure HubSpot Action
1. You will be prompted to map the DjaoApp user data fields to HubSpot contact fields. For example, you may map "User Email" field in the DjaoApp sample data to "Contact Email" field in HubSpot. The available Webhook field options depend on the data structure of the Webhooks request that you sent earlier during the test.
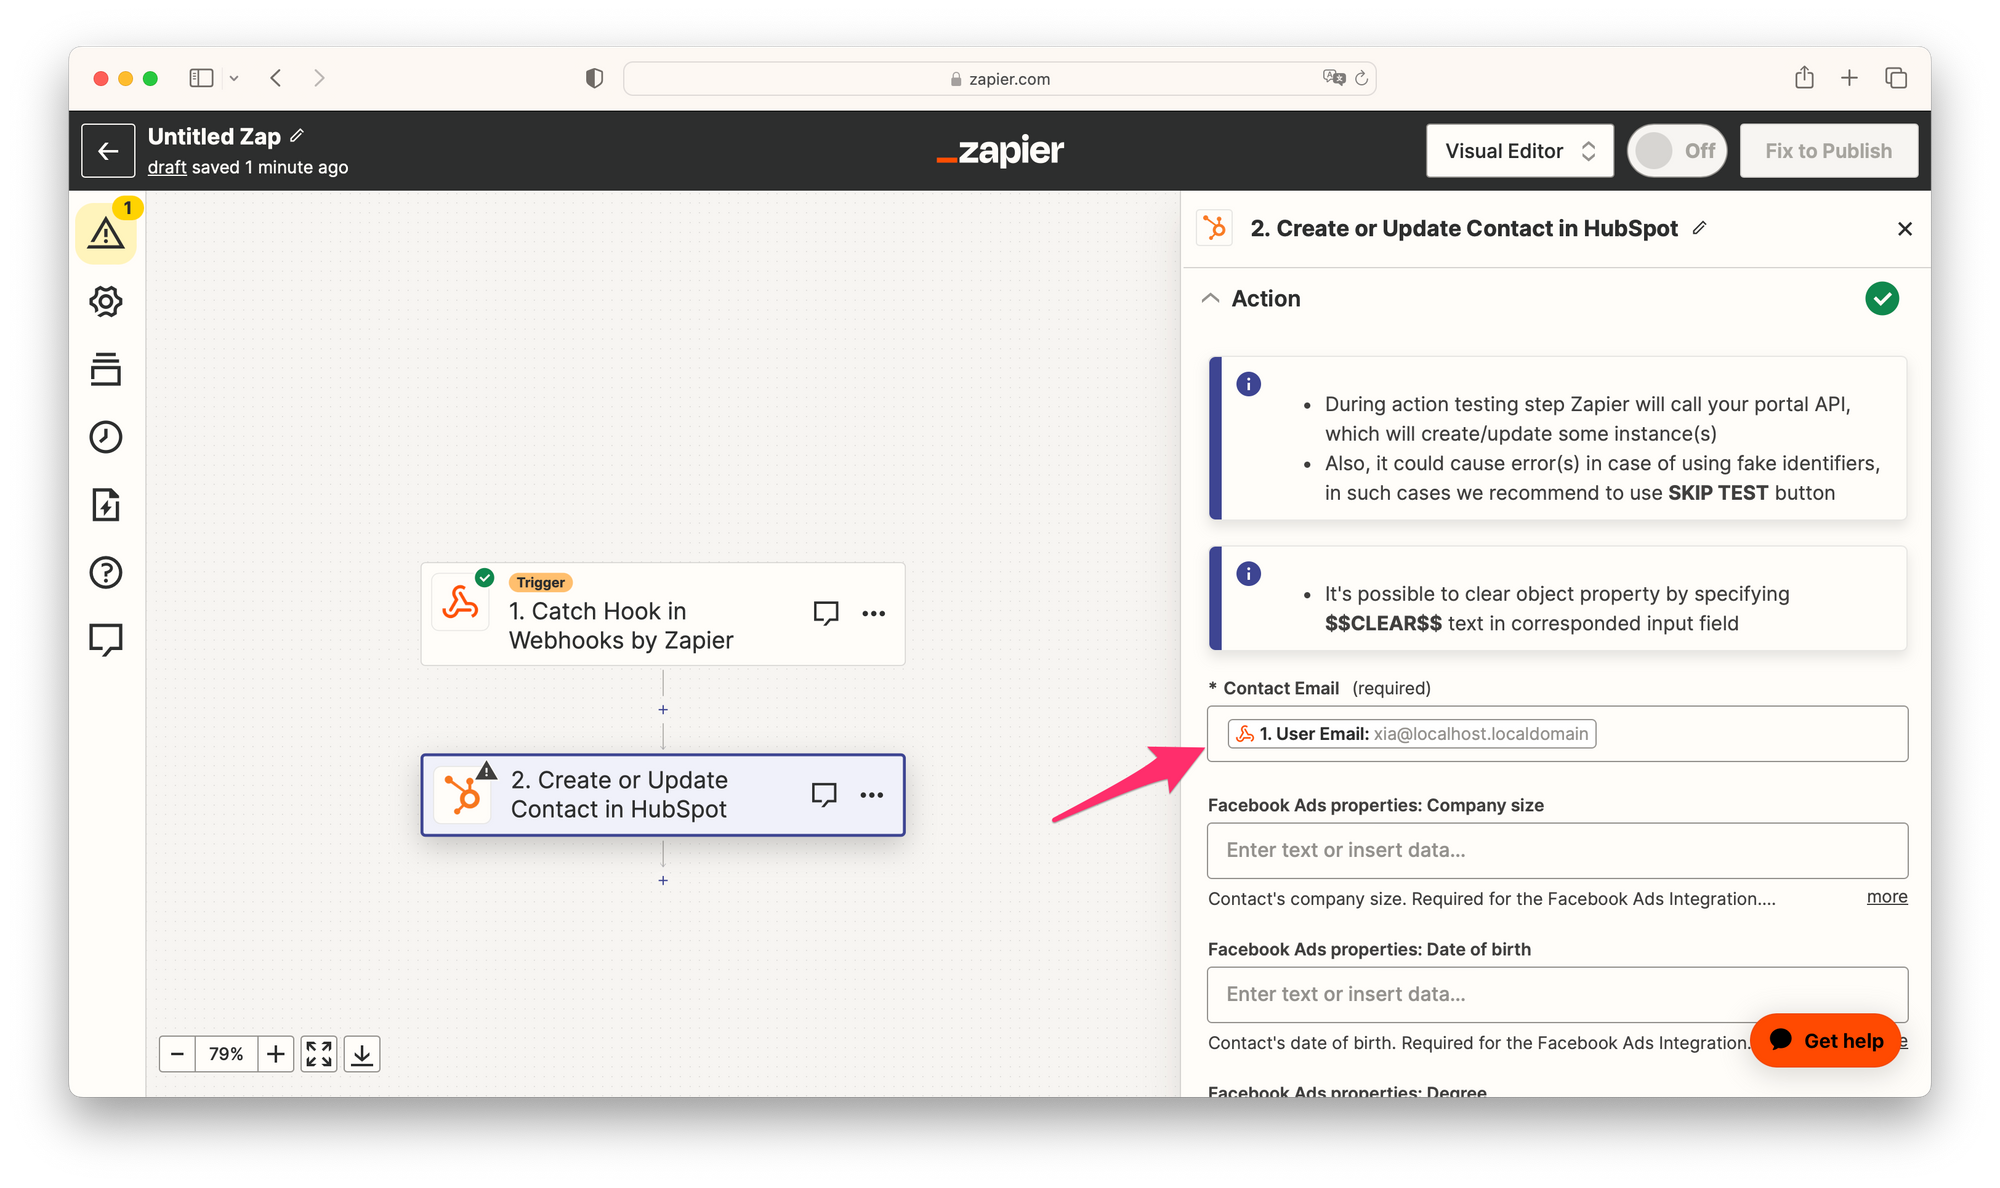
2. After mapping all required fields, click "Continue".
Step 8: Test HubSpot Action & Activate the Zap
1. Click "Test step” to ensure the action works as expected. This will attempt to create or update a contact in HubSpot using the sample data from DjaoApp.
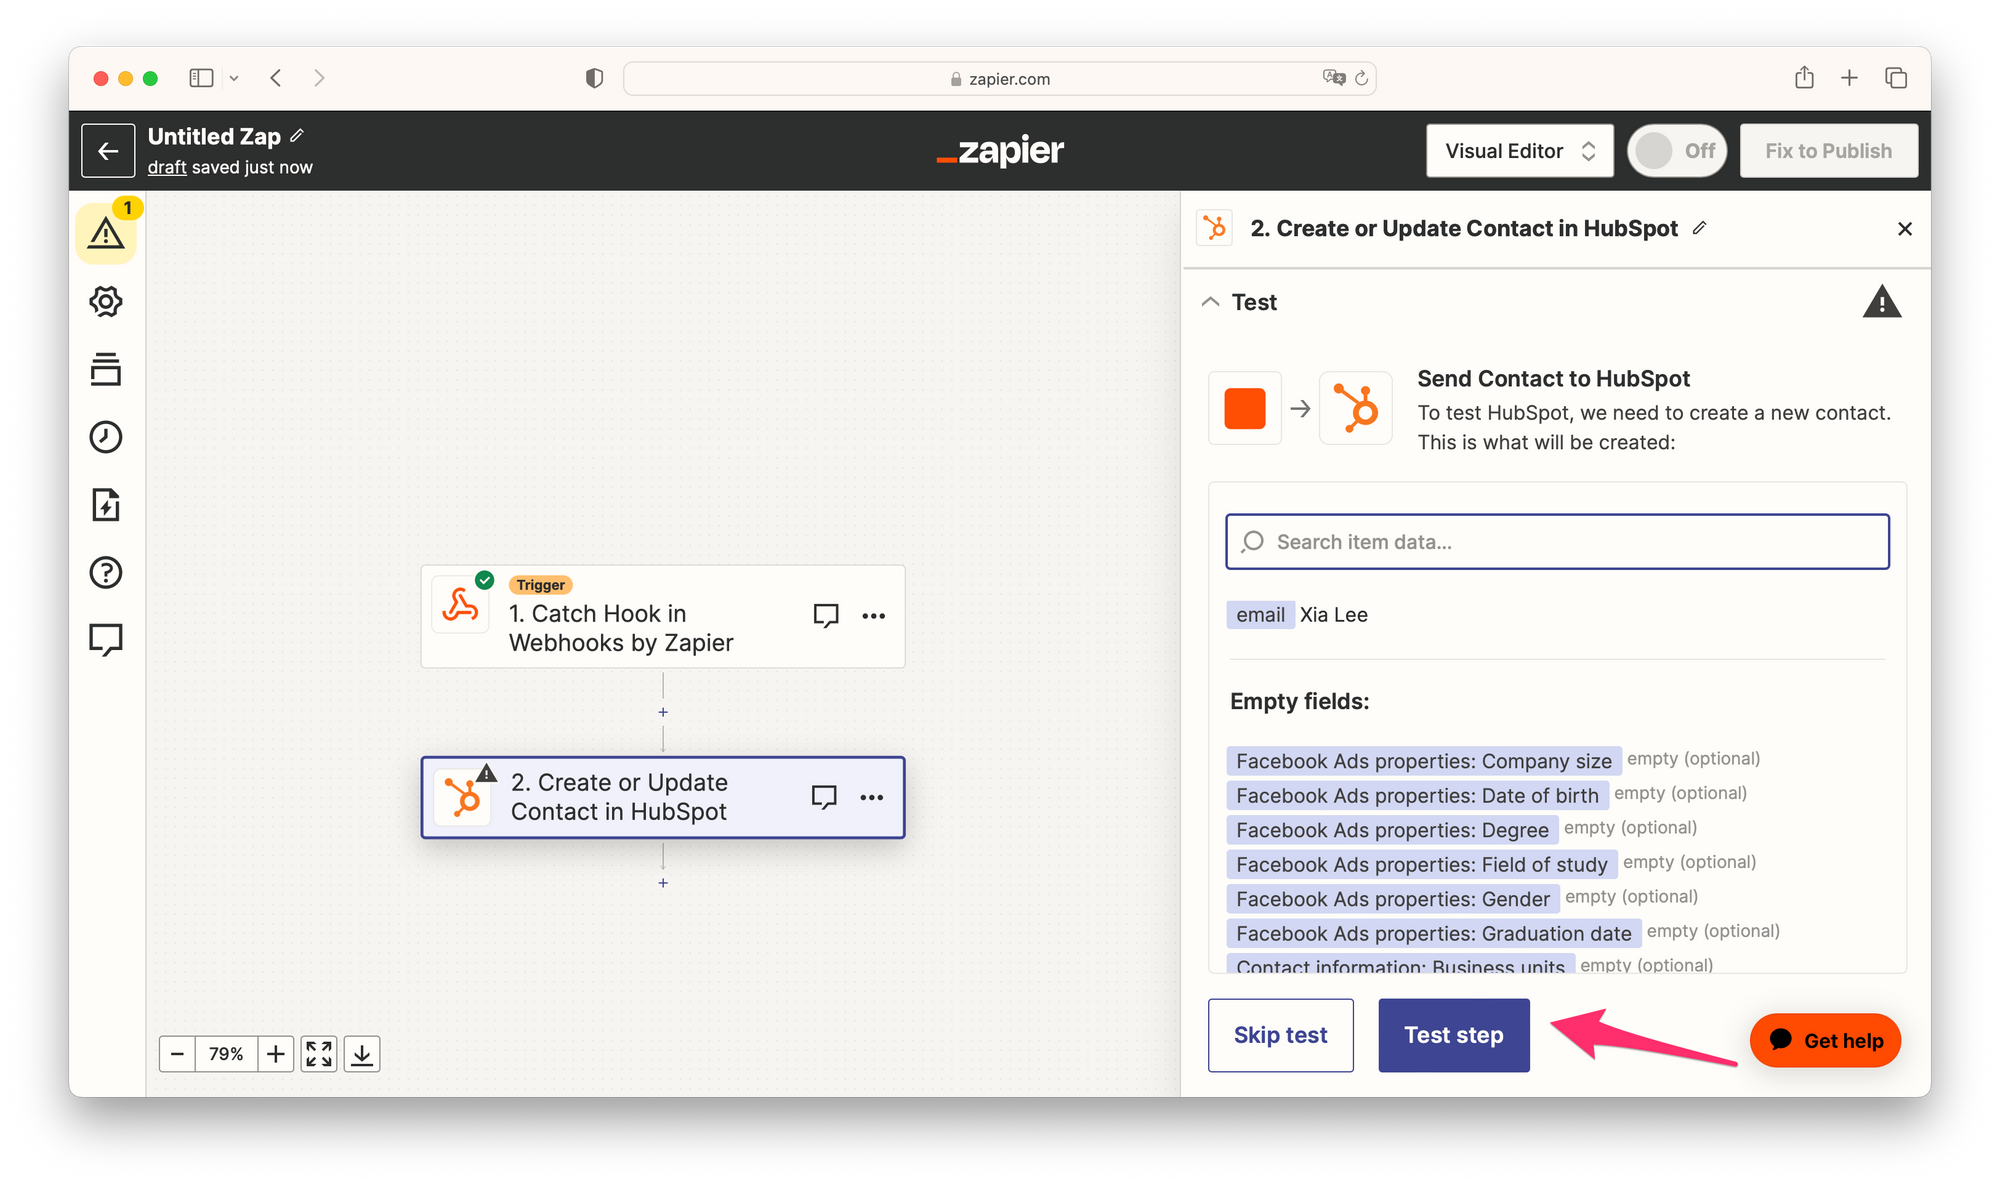
2. If the test is successful, click "Publish".
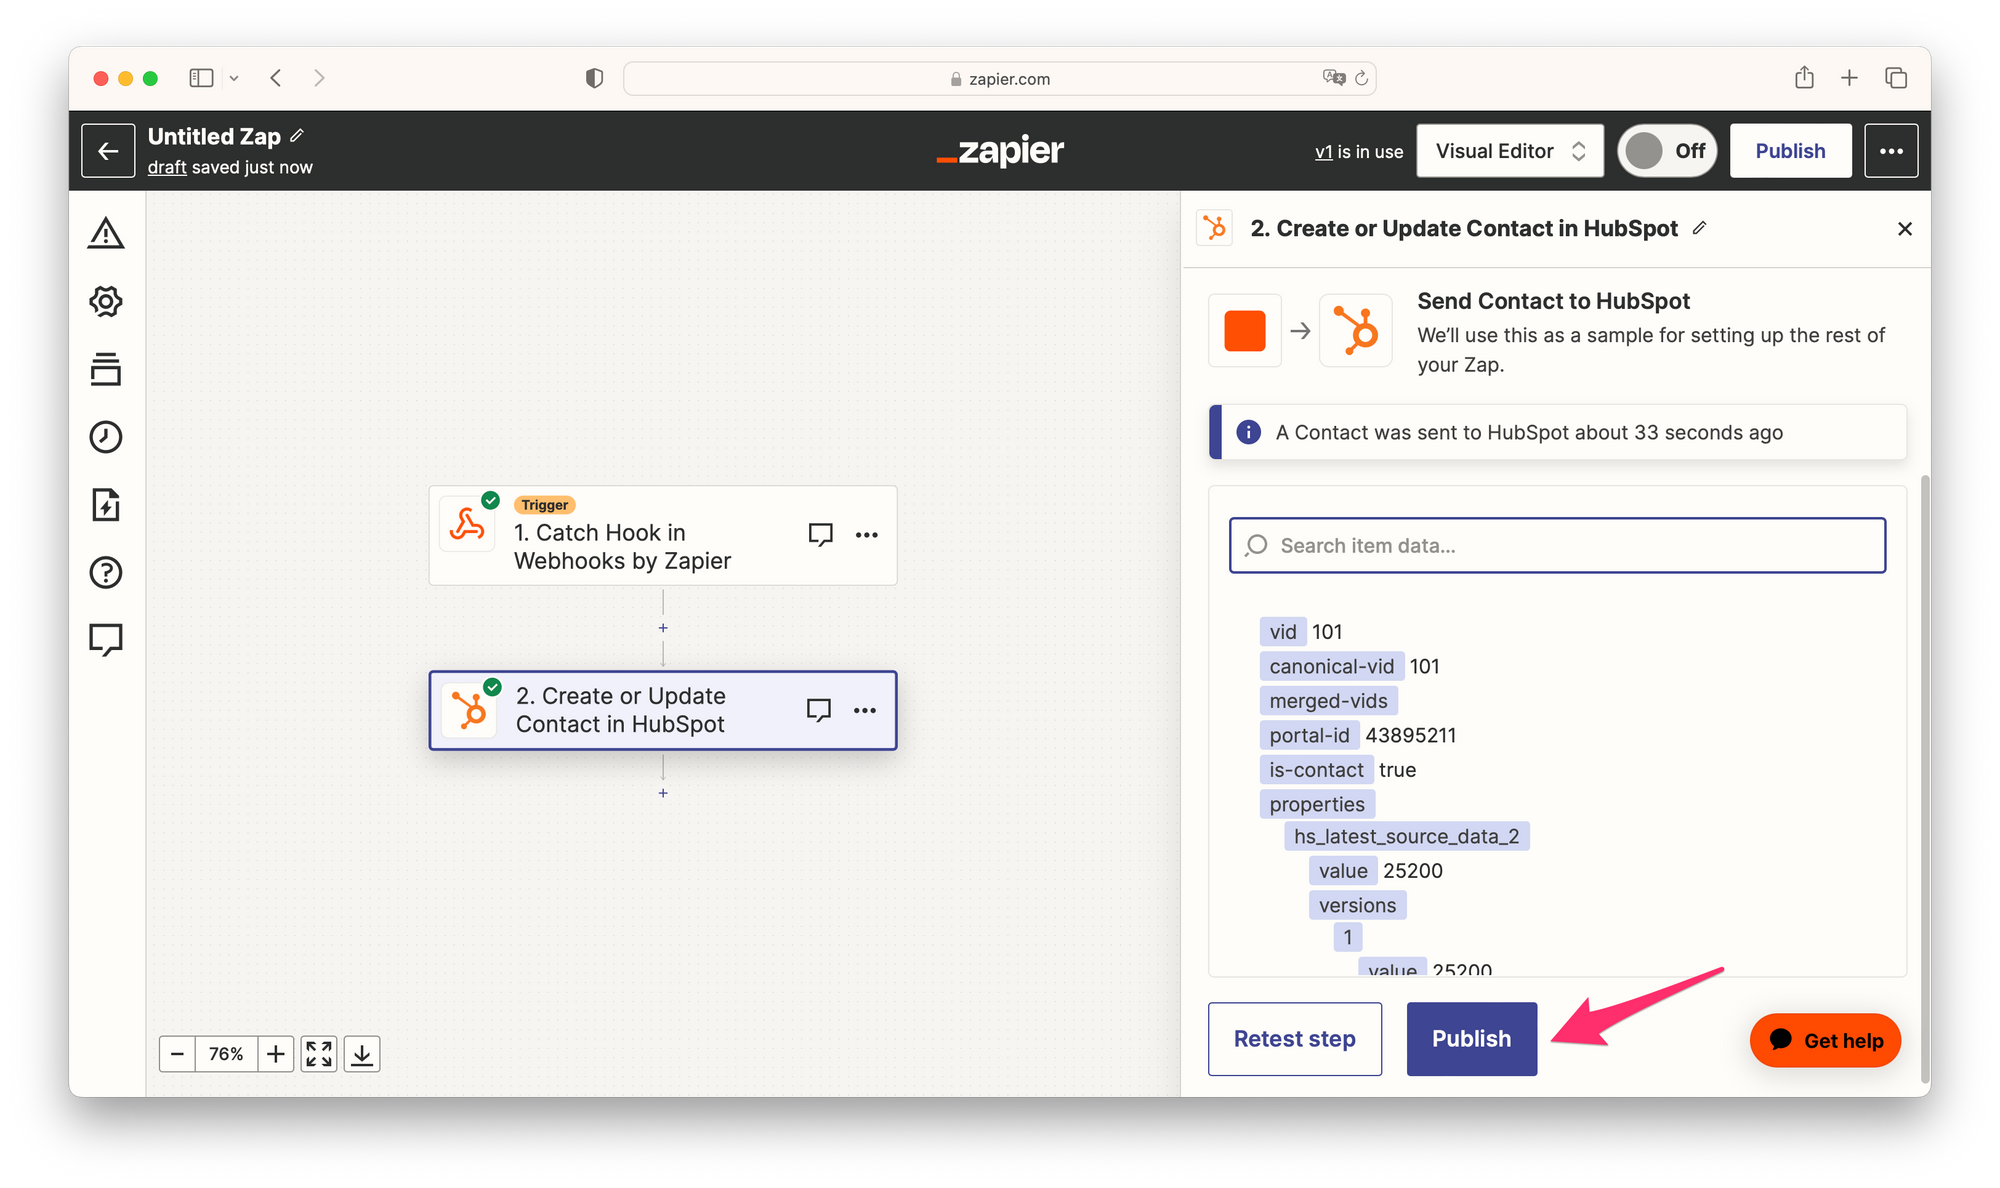
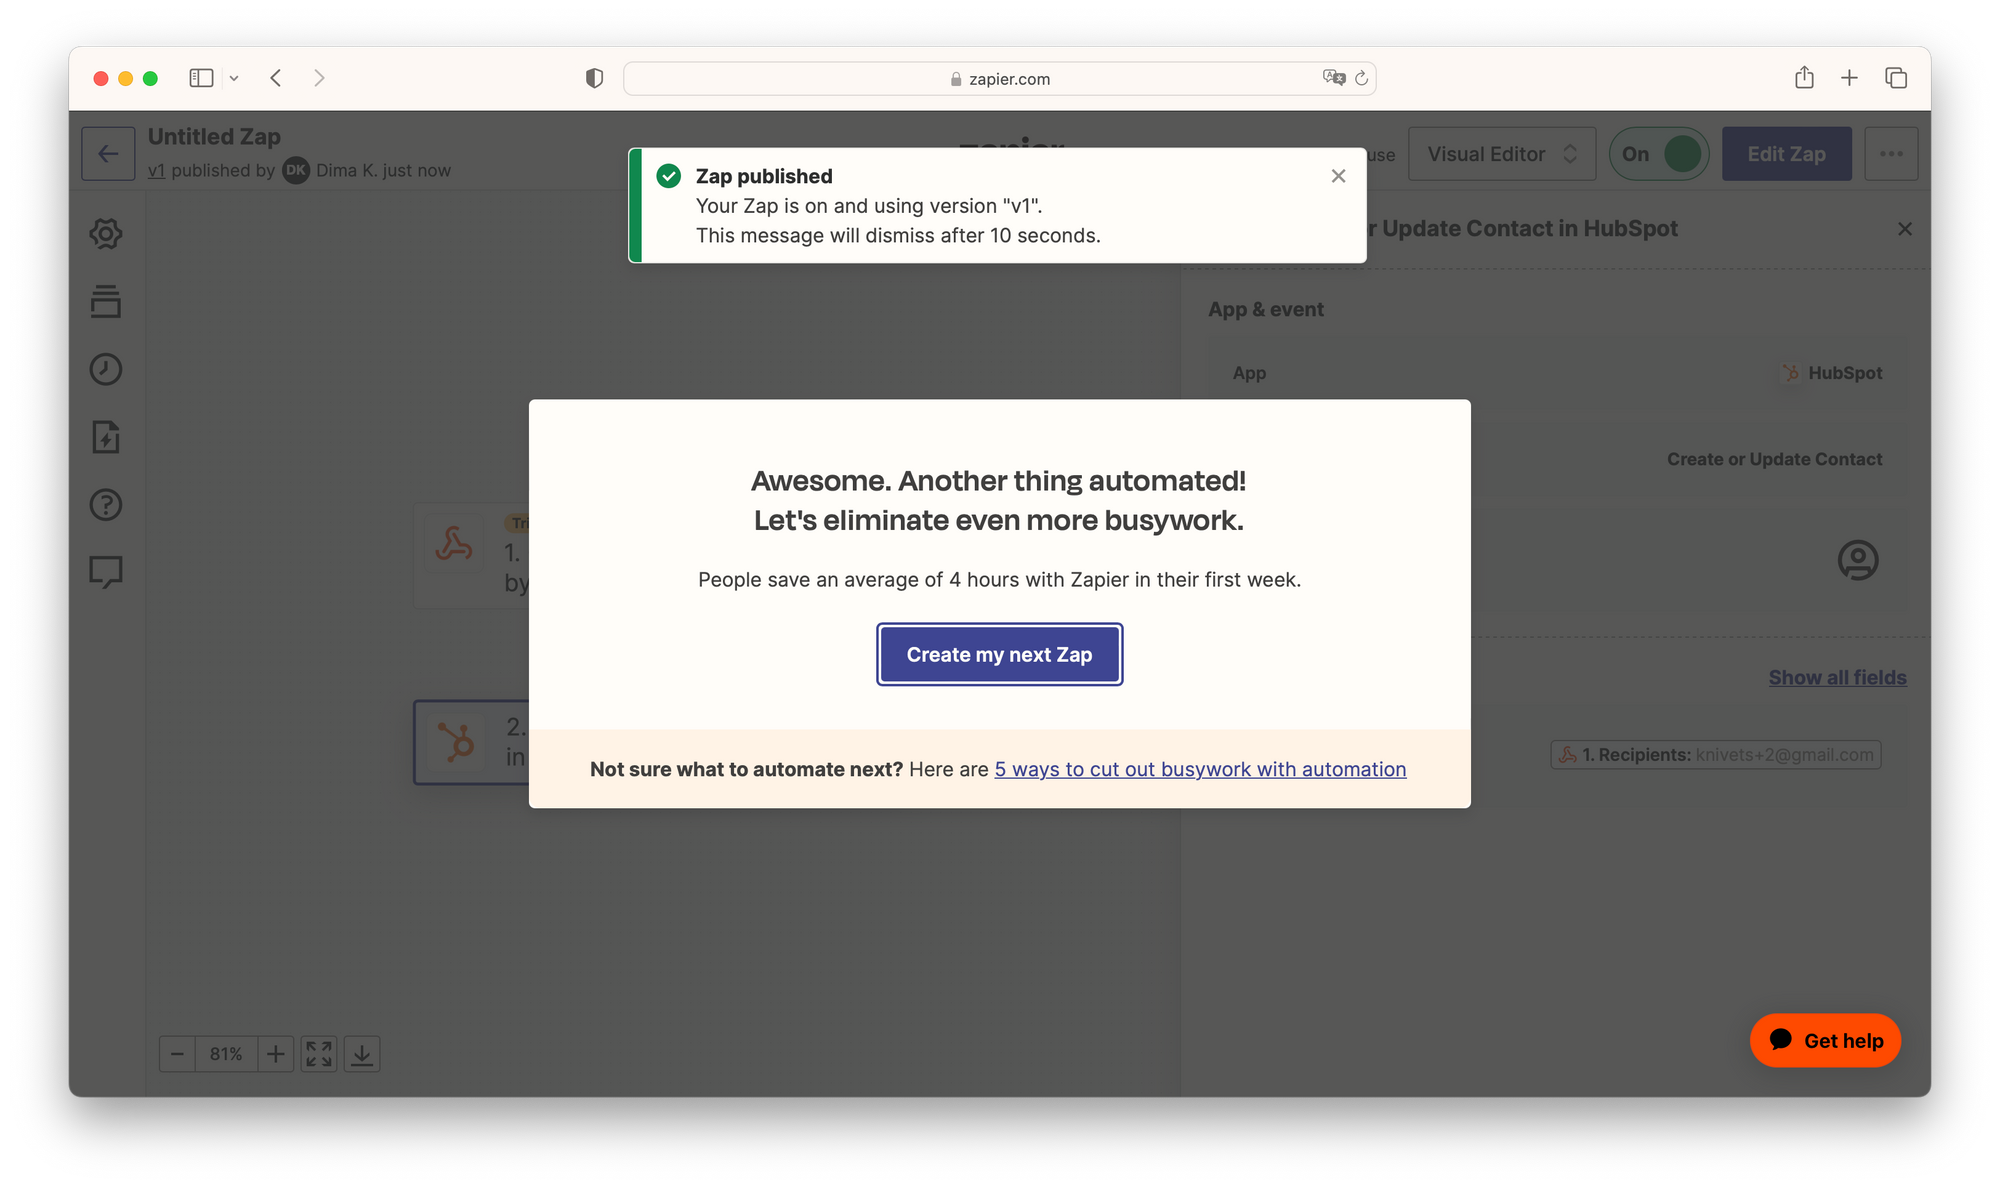
3. Your Zap is now active, and new registered users in DjaoApp will automatically be exported to HubSpot as contacts.
Conclusion
Congratulations! You've just automated the process of exporting registered users from DjaoApp to HubSpot via Zapier. You can now enjoy a more streamlined, efficient workflow.
For any further questions or issues, you might be interested to read the FAQs, or contact us.
- Need help?
- Contact us
- Curious how it is built?
- Visit us on GitHub